Written by Kate Tietje
Tiramisu is one of my favorite desserts.
I love creamy things, a hint of coffee (even though, ironically, I don’t drink coffee), and the not-too-sweet nature of it. That’s perfect for me — I don’t like overly sugary dishes, and ‘sugar’ isn’t what I’m looking for in a dessert. I want to enjoy it without that sickly, overdone feeling.
So, tiramisu it is.
Tiramisu is a traditional Italian dessert made with mascarpone cheese, whipping cream, espresso, cocoa powder, and ladyfingers. The ladyfingers are traditionally soaked in the espresso (sometimes with liqueur added, then placed in a layered dish and topped with a creamy filling. The top is dusted with cocoa powder, and then it is perfect.
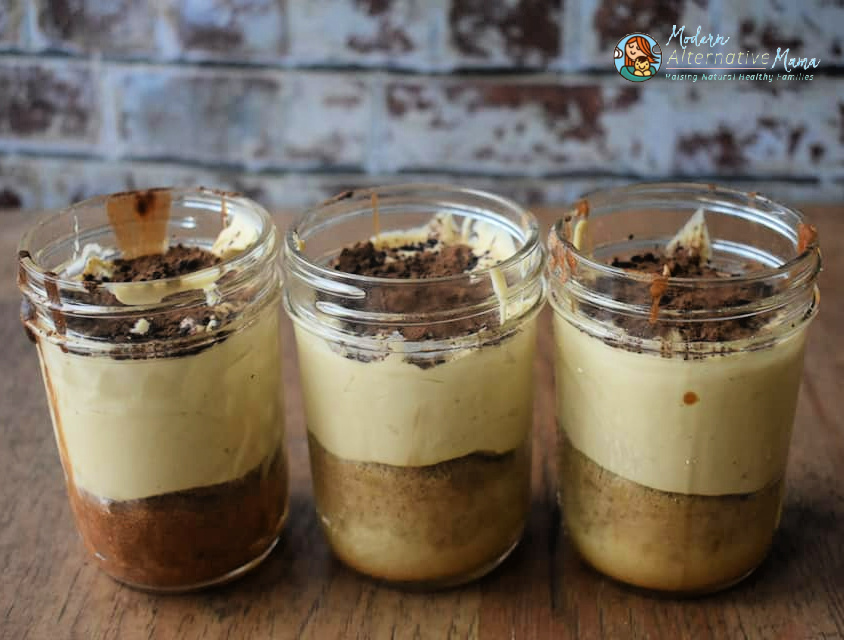
Tiramisu {Grain-Free}
I’m trying for a healthier — but still completely delicious — twist on this and making it a bit easier to make. Instead of ladyfingers (a sponge cake shaped like a long oval), filled with white sugar and flour, I made a grain-free, low-sugar sponge cake.
I also baked the sponge cake in individual mason jars and then added the filling on top. No layering, no piping, no extra steps. Just sheer deliciousness — and individual dessert cups.
It’s better if you make the filling and the sponge cakes a few hours before you want to put them together (I had to fast-chill my cakes in my fridge because I was impatient!), and then they need another few hours to chill after putting together, for the best flavor. We ate one the same night we made them, and it was decent, but the next day it was epic. Make-ahead is better in this case.
Sponge Cake Ingredients:
- 4 eggs, separated
- 5 tbsp. coconut sugar, divided
- 1 pinch salt (about 1/8 tsp.)
- 1 pinch baking soda (about 1/8 tsp.)
- 2/3 cup arrowroot powder
Filling Ingredients:
- 8 egg yolks
- 8 tbsp. coconut sugar, divided
- 16 oz. mascarpone cheese
- 1 1/2 cups whipping cream
- 2 tsp. vanilla
- 4 oz. coffee (I used a can of cold brew)
- Cocoa powder
Sponge Cake Directions:
Step 1: Preheat oven to 350ºF. Separate your eggs, placing the whites in a medium bowl and the yolks in a larger bowl. Ensure no yolk gets in the whites, or they won’t whip properly!
Step 2: Start whipping your egg whites with a hand or stand mixer until they become foamy. Add 2 tablespoons of coconut sugar, and continue whipping until they are shiny and form soft peaks. Set aside.
Step 3: Add the remaining coconut sugar (for the “cake” part) to the egg yolks. Begin beating these with a hand mixer until thick and lighter in color.
Step 4: In a third small bowl, sift the arrowroot powder, salt, and baking soda together.
Step 5: Slowly add the arrowroot mix to the egg yolk mix, stirring gently but well. It will get thick and sticky.
Step 6: Add the egg whites to the egg yolk mix in batches, folding and mixing carefully. Incorporate it without deflating the egg whites. It takes some work at first to get them into the stickiness, but by the end, it should be easier.
Step 7: Fill eight 8-ounce ungreased mason jars about 1/4 full with batter.
Step 8: Transfer mason jars to a baking tray (to make them easier to place in the oven), and put the tray in the oven. Bake for 20 – 25 minutes, or until golden brown.
Filling Directions:
Step 9: While the cakes are baking, keep the filling. Put the egg yolks in a clean bowl and save the whites for another time. (I’ll be using mine to make Strawberry Yum-Yum…)
Step 10: Add 3 tablespoons of coconut sugar to the yolks and whip until pale and thick.
Step 11: Add the remaining coconut sugar to the whipping cream and whip until soft peaks form.
Step 12: Add the mascarpone cheese to the whipped cream and vanilla and mix well. It may look a bit grainy and thick, but that’s okay.
Optional: Now…if you’re worried about raw eggs, you can do what I did. Place the egg yolk bowl over a pot of water on medium-high heat. As the water bubbles lightly, whip the egg yolks constantly until they are warm and slightly cooked (but not scrambled — that’s why you must whip constantly!). This kills any possible bacteria. Plunge the bowl into a sink with a couple of inches of cold water and keep whipping to rapidly cool the eggs. You can skip this step if you want.
Step 14: Mix the egg yolks into the whipped cream mix, folding until it’s all incorporated and smooth.
Assembly Directions:
Step 15: When the cakes are completely cool, add 1 tablespoon of coffee and swirl around so it soaks in. If it’s not absorbing easily, you can poke small holes with a toothpick.
Step 16: Scoop the cream filling on the cakes until just below the rim.
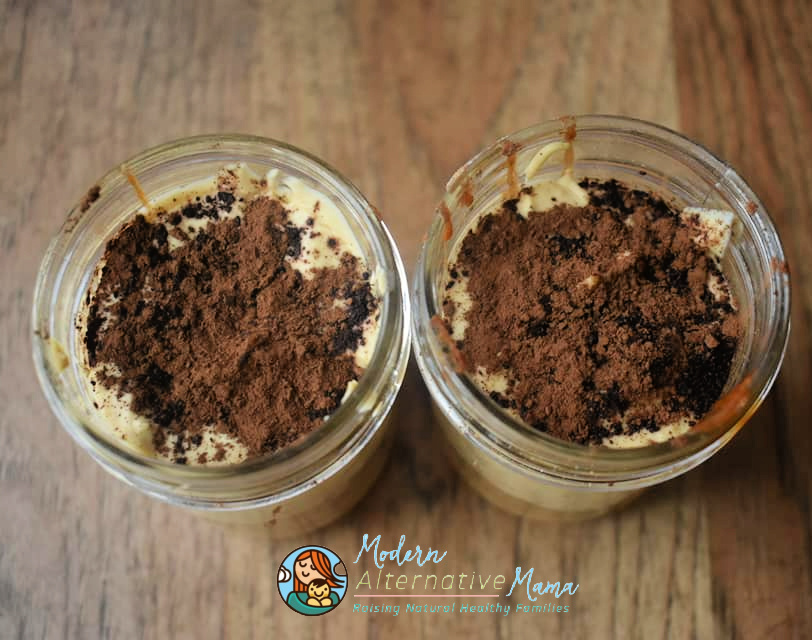
Step 17: Dust with cocoa powder.
Step 18: Place lids on the jars and keep in the fridge until ready to serve.
This one has a lot of steps…but it’s really not that complicated. I promise! And it’s worth it, and that’s way more important.
Tiramisu
Ingredients
Sponge Cake:
- 4 eggs separated
- 5 tbsp. coconut sugar divided
- 1 pinch salt about 1/8 tsp.
- 1 pinch baking soda about 1/8 tsp.
- 2/3 cup arrowroot powder
Filling:
- 8 egg yolks
- 8 tbsp. coconut sugar divided
- 16 oz. mascarpone cheese
- 1 1/2 cups whipping cream
- 2 tsp. vanilla
- 4 oz. coffee I used a can of cold brew
- Cocoa powder
Instructions
Sponge Cake
- Preheat oven to 350ºF. Separate your eggs, placing the whites in a medium bowl and the yolks in a larger bowl. Ensure no yolk gets in the whites, or they won't whip properly!
- Start whipping your egg whites with a hand or stand mixer until they become foamy. Add 2 tablespoons of coconut sugar, and continue whipping until they are shiny and form soft peaks. Set aside.
- Add the remaining coconut sugar (for the "cake" part) to the egg yolks. Begin beating these with a hand mixer until thick and lighter in color.
- In a third small bowl, sift the arrowroot powder, salt, and baking soda together.
- Slowly add the arrowroot mix to the egg yolk mix, stirring gently but well. It will get thick and sticky.
- Add the egg whites to the egg yolk mix in batches, folding and mixing carefully. Incorporate it without deflating the egg whites. It takes some work at first to get them into the stickiness, but by the end, it should be easier.
- Fill eight 8-ounce ungreased mason jars about 1/4 full with batter.
- Transfer mason jars to a baking tray (to make them easier to place in the oven), and put the tray in the oven. Bake for 20 - 25 minutes, or until golden brown.
Filling
- While the cakes are baking, keep the filling. Put the egg yolks in a clean bowl and save the whites for another time. (I'll be using mine to make Strawberry Yum-Yum...)
- Add 3 tablespoons of coconut sugar to the yolks and whip until pale and thick.
- Add the remaining coconut sugar to the whipping cream and whip until soft peaks form.
- Add the mascarpone cheese to the whipped cream and vanilla and mix well. It may look a bit grainy and thick, but that's okay.
- Optional: Now...if you're worried about raw eggs, you can do what I did. Place the egg yolk bowl over a pot of water on medium-high heat. As the water bubbles lightly, whip the egg yolks constantly until they are warm and slightly cooked (but not scrambled -- that's why you must whip constantly!). This kills any possible bacteria. Plunge the bowl into a sink with a couple of inches of cold water and keep whi ing to rapidly cool the eggs. You can skip this step if you want.
- Mix the egg yolks into the whipped cream mix, folding until it's all incorporated and smooth.
Assembly
- When the cakes are completely cool, add 1 tablespoon coffee and swirl around so it soaks in. If it's not absorbing easily, you can poke small holes with a toothpick.
- Scoop the cream filling on the cakes until just below the rim.
- Dust with cocoa powder.
- Place lids on the jars and keep in the fridge until ready to serve.


