Water extractions are a great option for those new to herbs. As a beginner myself, I find water extractions make understanding and recognizing an herb easier. Think about our five senses: sight, touch, smell, taste, and hearing. Although we can’t quite hear an herb (or a water extraction), we can practice the other four senses as we get to know them.
Using our senses can help us learn. When we are using our senses, it is a form of stimulation. It’s stored in the body and associated with memory for the future. This is why certain smells can bring back childhood memories you had forgotten about. The goal is to make a memory for learning purposes, which could help you identify and familiarize yourself with herbs in the wild.
With that said, look at the herb. What does it look like? What color is it? Does it remind you of something else you’ve seen before?
Now, touch the herb. What does it feel like? Is it soft or hard? Is it fluffy or dense? If you squeeze it between your fingers, does anything come out?
Don’t forget to smell the herb. What does it smell like? Is it sweet or spicy? Maybe it’s earthy. Do you like the smell?
And finally, taste the herb. What does it taste like? Is it sweet or bitter? Does it taste familiar, or is it a new flavor?
I like to practice these exercises whenever I work with a new herb. I do it in its raw form and again in its cooked form. I like getting to know the herbs I am working with.
You get to know the herbs in your apothecary. Understand how they work and focus on how they make you feel. These questions and exercises will help you learn how each herb’s medicinal benefits work.
Now for the moment you’ve been waiting for – how to make a water extraction.
How to Make a Water Extraction
If you read our blog, How to Make an Herbal Extraction (With Any Herb), you know there are many ways to make an herbal extraction, but you do not need the most complex option, even when using herbs as medicine. Often, as we learn more and more about herbs and their many extraction methods, we forget just how powerful a simple water extraction can be, and sometimes, that’s all we need.
Water extractions are the oldest and simplest extraction medium. Water extractions include infusions and decoctions. Although these extraction methods are the simplest (and fastest), their shelf life is the shortest.
Infusions
Infusions (or teas) are made by pouring boiling water over fresh or dried herbs and letting them steep for a certain timeframe (usually 10-15 minutes). Although teas are the fastest extraction method, they have the shortest shelf life – about 24 hours.
Infusion extractions can be done with soft/fluffy parts of herbs like leaves and flowers. Some of my favorite herbs for infusion include chamomile, mullein, and red raspberry leaf. A few starter recipes you could try are Simple Goldenrod Tea, Calming Marshmallow Tea, or Basic Pregnancy Tea.
Let’s learn how to make infusions step-by-step.
Step 1: Gather 2-3 grams (1 teaspoon) of dried herbs or 4-6 grams (2 teaspoons) of fresh herbs.
Step 2: Bring 8 ounces of filtered water to a boil.
Step 3: Place the dried or fresh herbs in the tea strainer and place it in the cup.
Step 4: After you’ve brought the filtered water to a boil, pour it into the cup over the tea strainer.
Step 5: Let the herbs steep for 10-15 minutes, and remove the tea strainer. Enjoy!
Decoctions
Decoctions are similar to infusions but still very different. Decoctions are made by bringing the herbs and water to a boil and letting them simmer for a certain timeframe (usually 20-30 minutes). Decoctions also have a very short shelf life but are still longer than infusions – about 48 hours.
Decoction extractions can be done with hard/dense parts of the herbs like hard berries, roots, barks, and seeds. Some of my favorite herbs for decoctions include hawthorn berry, elderberry, and marshmallow root.
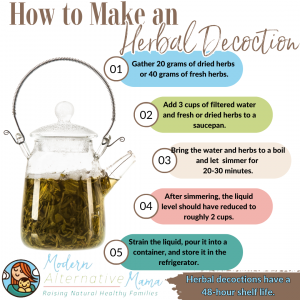
Let’s learn how to make decoctions step-by-step.
Step 1: Gather 20 grams of dried or 40 grams of fresh herbs.
Step 2: Add 3 cups of filtered water and fresh or dried herbs to a saucepan.
Step 3: Bring the water and herbs to a boil and let simmer for 20-30 minutes.
Step 4: After simmering, the liquid level should have reduced to roughly 2 cups.
Step 5: Strain the liquid, pour it into a container, and store it in the refrigerator.
Whether you’re a newbie or a seasoned herbalist, I hope this post was able to answer questions you may have had. Remember, herbalism isn’t all or nothing; every herbalist doesn’t look the same. It is okay to start slow, at your own speed, and figure out what works for you. Trial and error is the key, but hopefully, this post takes away most of the errors and leaves you with plenty of successful herbal remedies. Either way, with practice (and time), you’ll be making herbal remedies for everyone in your life in no time.

