Written by Kate Tietje
It’s time! To make cold process soap, that is. If you have missed our first two posts discussing cold process soap safety and equipment or cold process soap oils and extras, definitely read them first. It’s important to be safe and have the needed items before you start. Read those posts and then this one to be sure you’re ready to jump in. Then, buy your items, read the posts again, and go for it. You can do it!
Now, if you love this idea but just aren’t there yet (it did take me two years to work up the courage, after all, and I love to DIY all.the.things), then you can purchase pure, natural cold process soap from me at Earthley.
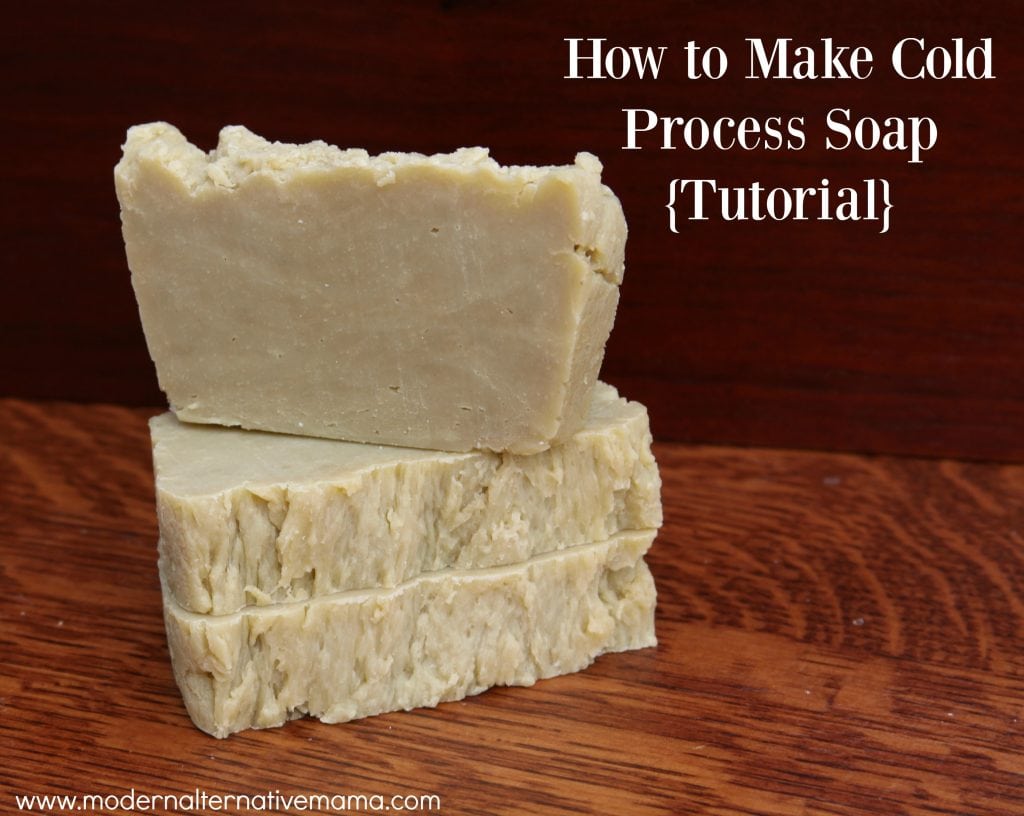
How to Make Cold Process Soap {Tutorial}
Time to dive in! Let’s make some cold process soap.
I recommend having kid-free time to do this, especially the first time. Lye can be very dangerous, and you don’t want any chance that your child could touch it or even breathe the fumes. If you have older kids, like 10+, whom you trust to be cautious, this could be a decent project to do together. I would not do it with small ones around, though.
If you’re intimidated, invite a friend over and figure it out together. Two brains are better than one!
When you’re ready…here’s what you need to do.
Step 1: The Lye
Prepare your lye water first because it will need 30 – 60 minutes to cool before use. If you do not let it cool enough, your soap will behave in weird ways — volcano (puffing up from overheating), separating, seizing, etc. I’ll cover the issues you may face in a separate post. Try to avoid them by doing it right, okay? Haha.
Weigh your water in a glass container. Yes, weigh it (2.90 oz.). Start with a recipe that uses only water to make things simple.

Weigh your lye in a separate glass container (3.96 oz.).

While wearing gloves and goggles, place your water under your stove’s exhaust fan. Stick a candy thermometer in the water.

Now, slowly pour the lye into the water. Never the other way around. Once the lye is in, stir it gently with a metal or plastic spoon until fully dissolved. You don’t want any lye crystals in your finished soap!

At this point, you must let your lye sit until it cools to around 130 degrees. I’ve noticed that my lye initially gets up to around 180 – 200 degrees, sometimes making whitish fumes when mixing. Stay far from this, and wear a mask if you’re worried!
I usually do other DIY projects in the kitchen to babysit my lye (I don’t want any chance of children getting near it) while I wait for it to cool. This should take about 20 – 30 minutes. (Don’t cook a meal near your lye! If you want to cook while waiting for it to cool, set it somewhere far away from the food, like across the room or even outside, so it won’t get disturbed.)
Feeling intimidated by now? Maybe you’d prefer to purchase pure, natural, cold process soap from me at Earthley.
Step 2: The Oils
When your lye is nearly cool, it’s time to prepare your oils!
Place a large measuring cup on your kitchen scale. Start adding your oils and butters very carefully, one at a time, until they reach the correct weight. For example, if your recipe calls for 15 oz. of olive oil, weigh that into your measuring cup. Keep going until all the oils and butters are added. Be as exact as you can.

Pour your oils into a large pot and turn them on low heat.
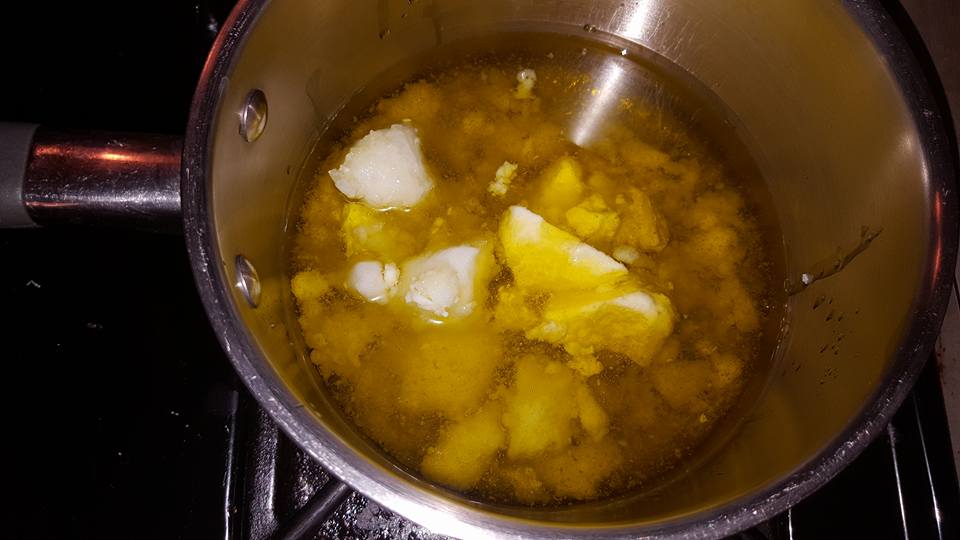
Allow your oils to melt completely.

Now, you’re ready to make soap!
Step 3: The Soaping
Make sure you have your gloves and goggles on for this part. And make sure that your lye water and oils are both right around 130ºF. I simply melt my oils and then turn my stove off.
Get your mold ready next to your pan so it’s easily accessible when you need it. A silicone spatula is a good idea, too.
Here we go! Time to make cold-process soap!
Check your lye water before adding it — stir it and ensure all the lye crystals are dissolved. If, for any reason, your lye has gotten too cool and you see it re-crystalizing, you can put the container of lye water into a pot of water (like a double boiler) and very gently reheat it. If you’re unable to do that safely and completely…throw it out and start again. No lye crystals can go in the oils!!
Very carefully, pour your lye water into your oils.

Using your immersion blender, stir gently for a minute (blender off).
Turn your blender on low. Blend your soap for a minute or two, then stir with the blender off for a minute. Keep alternating.

When your soap has thickened, and it looks kind of like pudding, and when you draw the blender through it, the soap kind of lightly holds the shape, you’ve reached trace! This means your soap is done.

If you are adding anything extra to your soap, do it now and blend it in carefully using a silicone spatula. This goes for clay, essential oils, spices, etc. Work quickly because your soap will start to firm up fast. Some additions can cause it to firm even faster…so you might not want to add anything your first time. Otherwise, time to pour it into the mold!
Use your silicone spatula to carefully scrape the soap from the pot and into the mold. It should be thin enough to still pour, like a thick batter. (If not, see my troubleshooting post.)

Now, set it aside to cool and harden completely. This should take about 1 – 2 days. Coconut oil soap will harden in just a few hours, while olive oil soap may need 2 – 3 days. Blends of oils will be in between.
You can insulate your cold process soap — basically, wrap a towel around the mold. When your soap is very hot (common), it sometimes goes through the “gel phase.” The soap looks a bit darker and more translucent. If you do not want it to go through the gel phase, stick it in the fridge to cool faster. Wrap it up if you want it all to go through the gel phase. Otherwise, the outside inch usually cools quickly and doesn’t go through the gel phase, while the middle does.
This is what the gel phase looks like. See the darker/translucent parts in the center:

Either way, your soap will work fine; it just doesn’t look uniform. It doesn’t matter a whole lot.
Not quite ready to dive in? You can purchase pure, natural, cold, process soap from me at Earthley.
Step 4: The Curing
Be patient and let your cold process soap sit in the mold until it’s firm. If you can squeeze it gently and maintain its shape, it’s probably ready!
Tip your soap out of your mold. Using a flexible silicone mold makes this super easy.

Using a sharp, non-serrated knife, cut your soap into bars.

Set your bars up somewhere away from children, where they can get good airflow. Mine are in my office because kids aren’t really allowed in here. Let your soap sit for 4 – 6 weeks, turning occasionally so all sides get air.
Your soap will harden during this time, the pH level will balance out (lye is a base, so the pH starts pretty high), and up to 15% of the water will evaporate. Your cold process soap will last much longer if you wait for the cure.
Some soaps may be ready to use almost immediately (pure coconut oil soap is), and some may be ready after 2 – 3 weeks (soaps high in ‘hard’ oils, maybe), but soaps with softer oils need the full 4 – 6 weeks. I gently squeezed my softer soaps after 1 – 2 weeks, and they felt firmer than they did originally but still had some ‘give’ to them — they weren’t ready.
How cool is this?! You have SOAP! That you made yourself!!
I always love it. I described it to one of my friends over PM one night as feeling like I have “magic hands” because I make good things. She totally lost it. Ha!
Coming up soon, I’ll be sharing all the mistakes I made (so that hopefully you won’t do the same) and how I fixed them — and have learned to avoid them in the future! Plus, several soap recipes and additional recipes on what to do with some of those soaps!
Still intimidated? That’s okay, we can’t all do everything, right? You can purchase pure, natural, cold, process soap from me at Earthley.

[…] process soap making. I shared with you lye safety and equipment, oils and extras, and the actual cold process soap tutorial. But now we have to talk troubleshooting. If you’re anything like me, you think you […]
[…] Soap […]