Written by Kate Tietje
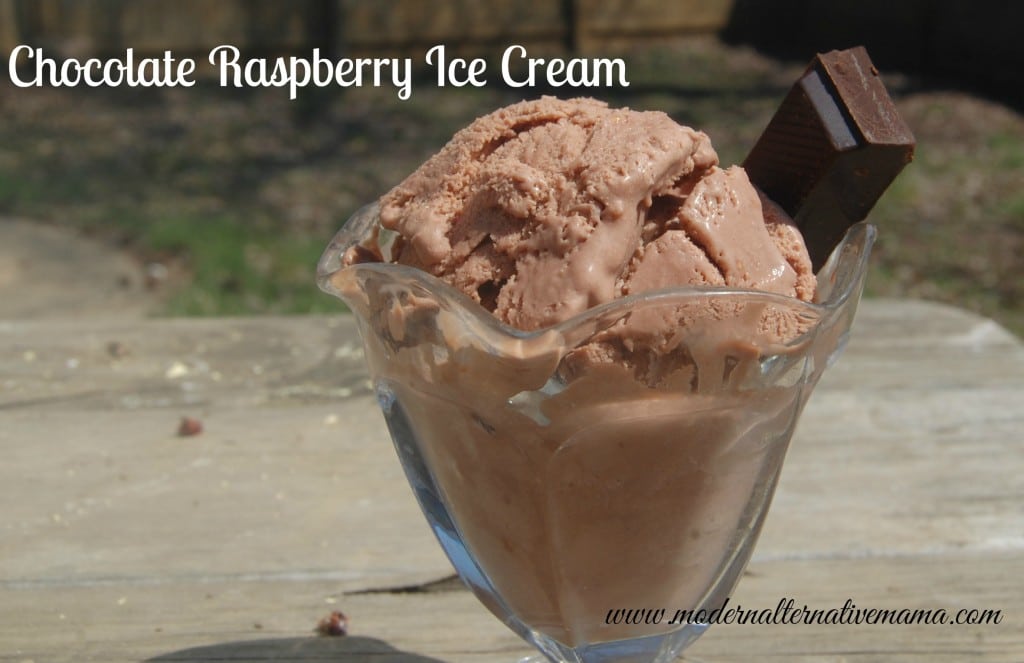
How delicious does chocolate-raspberry ice cream sound (and look)? I promise…it tastes even better. It’s rich, creamy, sweet, and filled with slightly sour raspberry goodness. It’s a dream treat. My kids have been begging for it daily since I made it. It even works as bribery!
You will need an ice cream maker for this. But if you don’t have one, you should get one. We’ve had one for 8 years, and when the motor burned out a few months ago, we promptly bought another. We use it a few days a week, at least. We have this one if you’re curious. Just trust me — you need one, especially during the warmer months!
Chocolate-Raspberry Ice Cream
Ingredients:
- 1 1/4 cups organic sugar, divided
- 2 oz. unsweetened baking chocolate*
- 4 egg yolks
- 4 cups of half-and-half
- 10 oz. raspberries (thawed, if frozen)
- 1 tsp. vanilla extract (try making homemade vanilla extract)
*This will make a light milk chocolate ice cream. You can double this if you want dark chocolate.
Directions:
Step 1: Combine the chocolate and 1 cup of sugar in a large saucepan.
Step 2: Add the half & half.
Step 3: Turn this on to medium heat and stir occasionally. Set the raspberries (which should be partially thawed) in a strainer over a bowl. Mash them a little here and there as you have time.
Step 4: Meanwhile, mix the egg yolks and remaining 1/4 cup sugar in a glass bowl
Step 5: Whisk this mixture until thick and light yellow. Set it aside.
Step 6: Cook the sugar, half-and-half, and chocolate mixture until it steams lightly. Then, while whisking the egg mixture, pour a small amount of the chocolate mixture into the eggs.
Step 7: Once this mixture is warmed, pour it back into the pot of chocolate mix. The idea is not to shock the eggs because doing so will cook them — and nobody likes small slivers of cooked egg in their ice cream!
Step 8: Now, continue to cook this mixture over medium until it thickens. It’ll start to coat the back of a wooden spoon, and that’s how you know it’s done.
Step 9: If you haven’t fully strained the raspberries, finish doing it. Mash them with a fork and get all that yummy juice out. Scrape off the bottom of the strainer, too; there’s a lot of goodness there. Then, pour all this yumminess into the ice cream mix.
Step 10: You’ll have leftover raspberry puree (the ‘chunks’ and seeds). You can throw it out. Or put it in another project. Or eat it with a spoon. I ate mine.
Step 11: Stir it up. Then, you need to cool off the mix. If you’re patient, you can put it in the fridge overnight. I am not patient, so I sat the pan in a sink full of cold water, stirring now and then. This takes 30 – 60 minutes to cool off. It should be no warmer than room temperature but ideally cooler than that (around 40).
Step 12: Once cool, pour it into an ice cream maker and freeze according to the manufacturer’s directions, typically 20 – 30 minutes for an electric machine. Serve immediately (it will be like soft serve) or transfer to glass containers to freeze for several hours to be harder, like “real” ice cream. We enjoyed ours both ways.
Ingredients
Method
- Combine the chocolate and 1 cup of sugar in a large saucepan.
- Add the half & half.
- Turn this on to medium heat and stir occasionally. Set the raspberries (which should be partially thawed) in a strainer over a bowl. Mash them a little here and there as you have time.
- Meanwhile, mix the egg yolks and remaining 1/4 cup sugar in a glass bowl
- Whisk this mixture until thick and light yellow. Set it aside.
- Cook the sugar, half-and-half, and chocolate mixture until it steams lightly. Then, while whisking the egg mixture, pour a small amount of the chocolate mixture into the eggs.
- Once this mixture is warmed, pour it back into the pot of chocolate mix. The idea is not to shock the eggs because doing so will cook them -- and nobody likes small slivers of cooked egg in their ice cream!
- Now, continue to cook this mixture over medium until it thickens. It'll start to coat the back of a wooden spoon, and that's how you know it's done.
- If you haven't fully strained the raspberries, finish doing it. Mash them with a fork and get all that yummy juice out. Scrape off the bottom of the strainer, too; there's a lot of goodness there. Then, pour all this yumminess into the ice cream mix.
- You'll have leftover raspberry puree (the 'chunks' and seeds). You can throw it out. Or put it in another project. Or eat it with a spoon. I ate mine.
- Stir it up. Then, you need to cool off the mix. If you're patient, you can put it in the fridge overnight. I am not patient, so I sat the pan in a sink full of cold water, stirring now and then. This takes 30 - 60 minutes to cool off. It should be no warmer than room temperature but ideally cooler than that (around 40).
- Once cool, pour it into an ice cream maker and freeze according to the manufacturer's directions, typically 20 - 30 minutes for an electric machine. Serve immediately (it will be like soft serve) or transfer to glass containers to freeze for several hours to be harder, like "real" ice cream. We enjoyed ours both ways.

Mmmmmm…now I need to go buy an ice cream maker! This sounds wonderful and I have leftover raspberry puree from another recipe. It is just sitting in the freezer waiting to be turned into something wonderful…like this!
I made this to celebrate my brother’s engagement, and it was a hit! I was a little concerned, because before I put it in the ice cream maker it seemed almost curdled, but it came out smooth and delicious. Thanks for sharing the recipe!