Written by Kate Tietje
I have been looking for the perfect purse for yeeeeeeeeeeeears. But I’m really picky. I have looked at many purses, used some of them, and never found exactly what I wanted.
Until now.
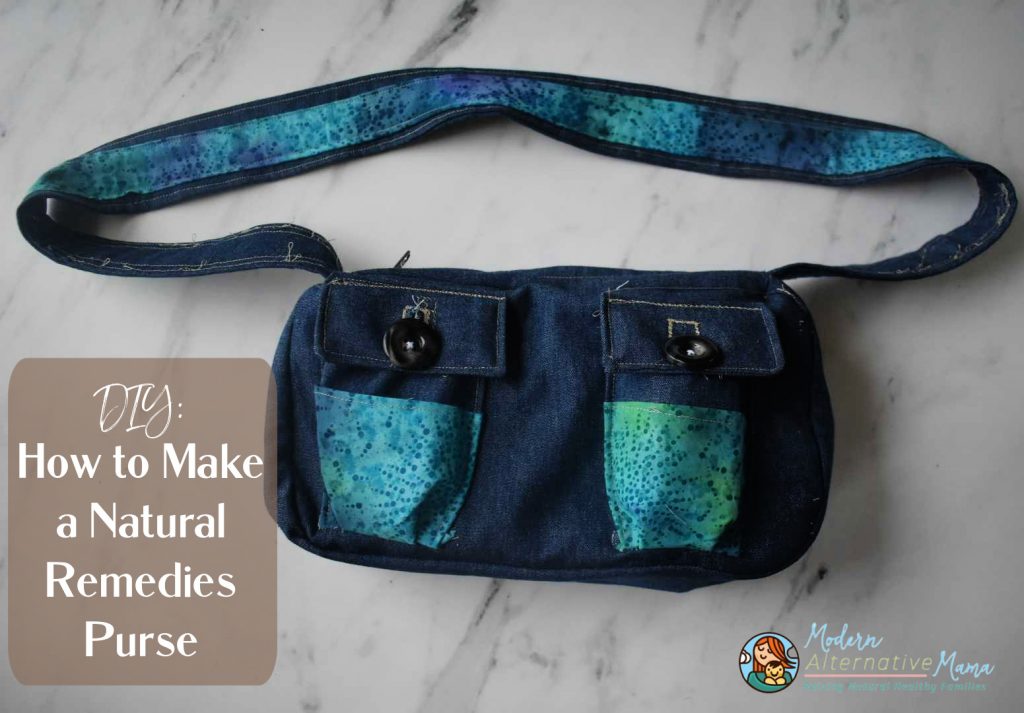
I decided to design my own purse to meet my needs, and it is perfect. Today I’m going to show you how to make one, too!
The Ultimate Natural Mama Purse
So, what is so special about this purse? Well, for starters, it has everything I am looking for in a purse, including:
Medium-Sized
I don’t want a giant purse that can hold everything and the sun. They’re awkward and heavy to carry around. But I also don’t want a tiny purse that can only hold my debit card. A nice middle ground that holds everything most important to me (wallet, phone, keys, and a few extras), and that’s it. It must also be easy to carry (shoulder strap) and not too heavy.
Lots of Pockets
I like to keep things organized. I need plenty of pockets so I can do that! I don’t like cluttered purses.
Space for Natural Remedies
I don’t want to throw glass tincture bottles at the bottom of my purse or tuck them in some pocket where they could theoretically tilt and spill…or get forgotten. I want an organized, defined space for them!
Here’s what I typically carry in my purse:
- Wallet
- Phone
- Keys
- Extra contacts + case + solution
- Hair ties
- Pens
- Salves (Eartley’s All-Purpose, Arnica, and Black Drawing Salve)
- Tinctures (Earthley’s Anti-Inflammatory and Infant Tummy Relief)
- Odds and ends (an old note from a friend, fun rocks, old/new keys)
That’s it. I don’t carry around receipts or toys or extra stuff! And I need a purse that can hold it all…and be cute and fun to carry.
How to Make a Natural Remedies Purse
You don’t need a special pattern for this because most pieces are simple rectangles. You can leave them that way or round off the edges (I’ve done both). Depending on your preferences, you can also size this purse up or down. These are the pieces you will need. Pay attention to the size of the ‘extra’ pieces if you want to scale it — the interior remedy holder is about half as tall as the height of the main side (once hemmed) and twice as long, for example.
What you need to cut:
Main Fabric
- 3- 8″ x 11″ rectangles (main sides)
- 1- 5″ x 22″ rectangle (interior remedy holder)
- 2- 5″ x 5″ squares (pocket)
- 2- 4″ x 4″ squares (pocket closure)
- 1- 25″ x 4″ rectangle (bottom/sides)
- 1- 4″ x 11″ rectangle (top of purse)
- 1- 4″ x 38″ rectangle (strap)
Contrasting Fabric
- 2- 8″ x 11″ rectangle (interior design)
- 2- 5″ x 3″ rectangle (pocket contrast)
- 1- 5″ x 11″ rectangle (exterior design)
- 1- 2″ x 38″ rectangle (strap)
Notions:
- 7″ zipper (sturdy, for exterior)
- 6″ zipper (for interior)
- Thread
Directions:
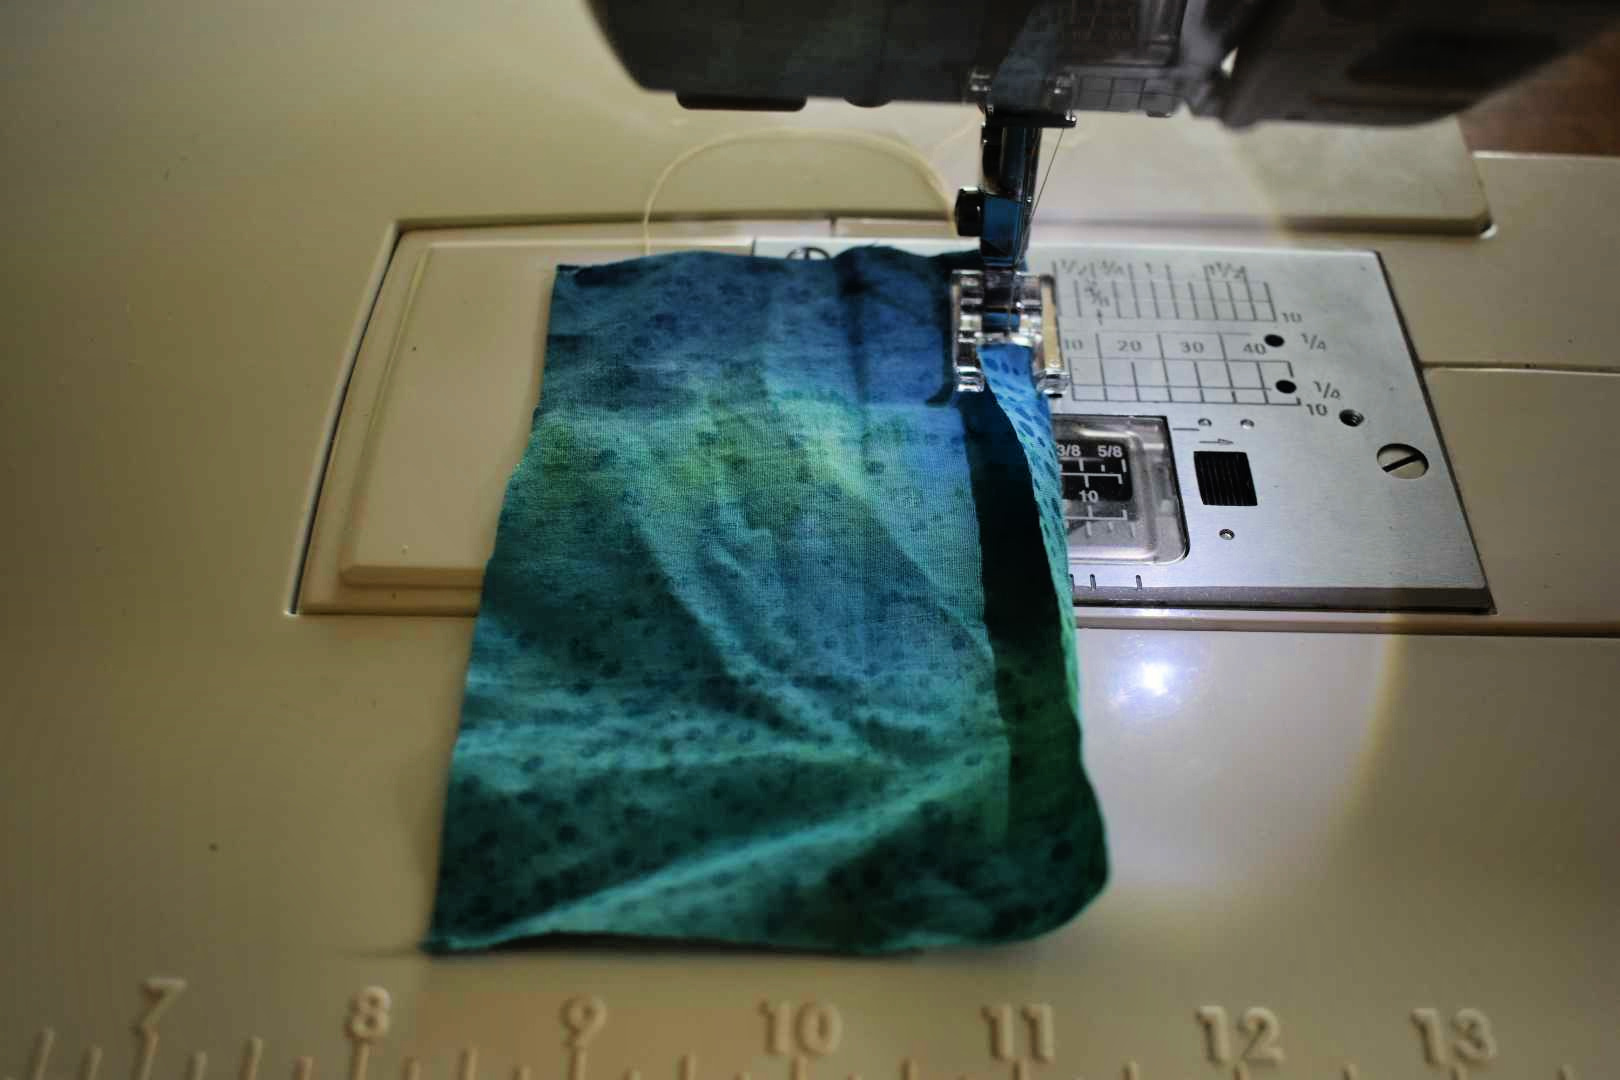
Step 1: We’ll do the pockets first. Hem the top of your contrasting fabric.
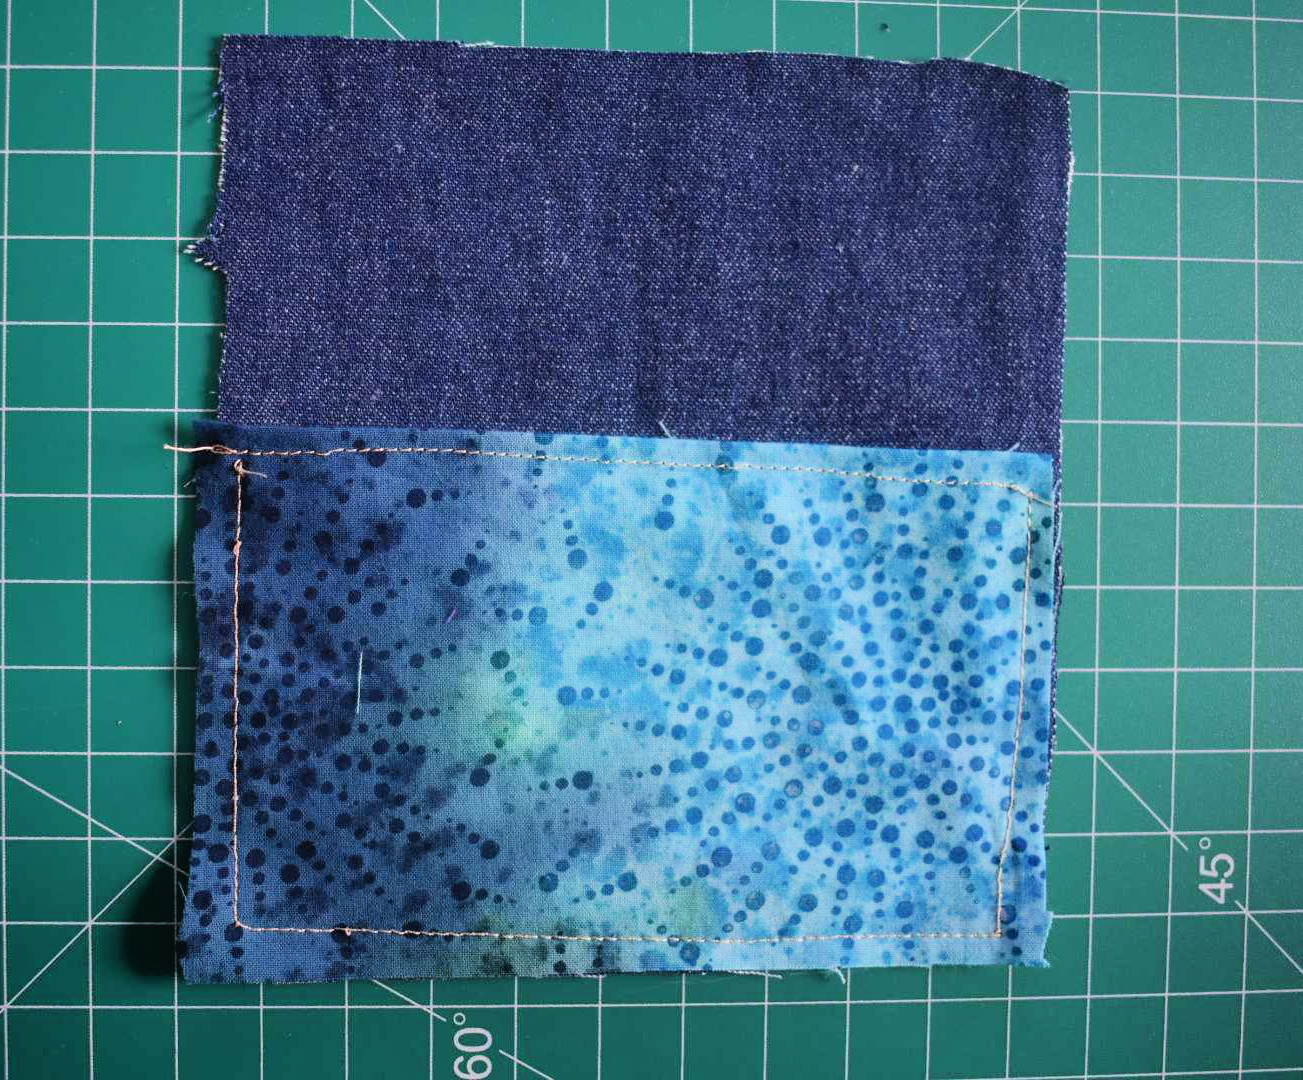
Step 2: Place the contrasting fabric onto the pocket (5×5 square) and sew it on. I did not sew across the center, which creates an extra little pocket between the main and contrasting fabric, but you can if you want to.
Hem the top of the pocket now (main fabric).

Step 3: Take the 4×4 squares and fold them in half, right sides together. Sew around one short side and the long side. Then, turn it right side out, tuck the open ends in, and sew it closed. Continue sewing around the whole thing to finish it.
Step 4: Take one of the main body pieces (main fabric). Find a space about 2″ in from the side and 1″ up from the bottom — this is where you will sew the bottom of the pocket.
Gather the pocket like a pleat (shown above) and sew it down to the main body fabric upside down (the wrong side of the pocket facing out, on the right side of the body).
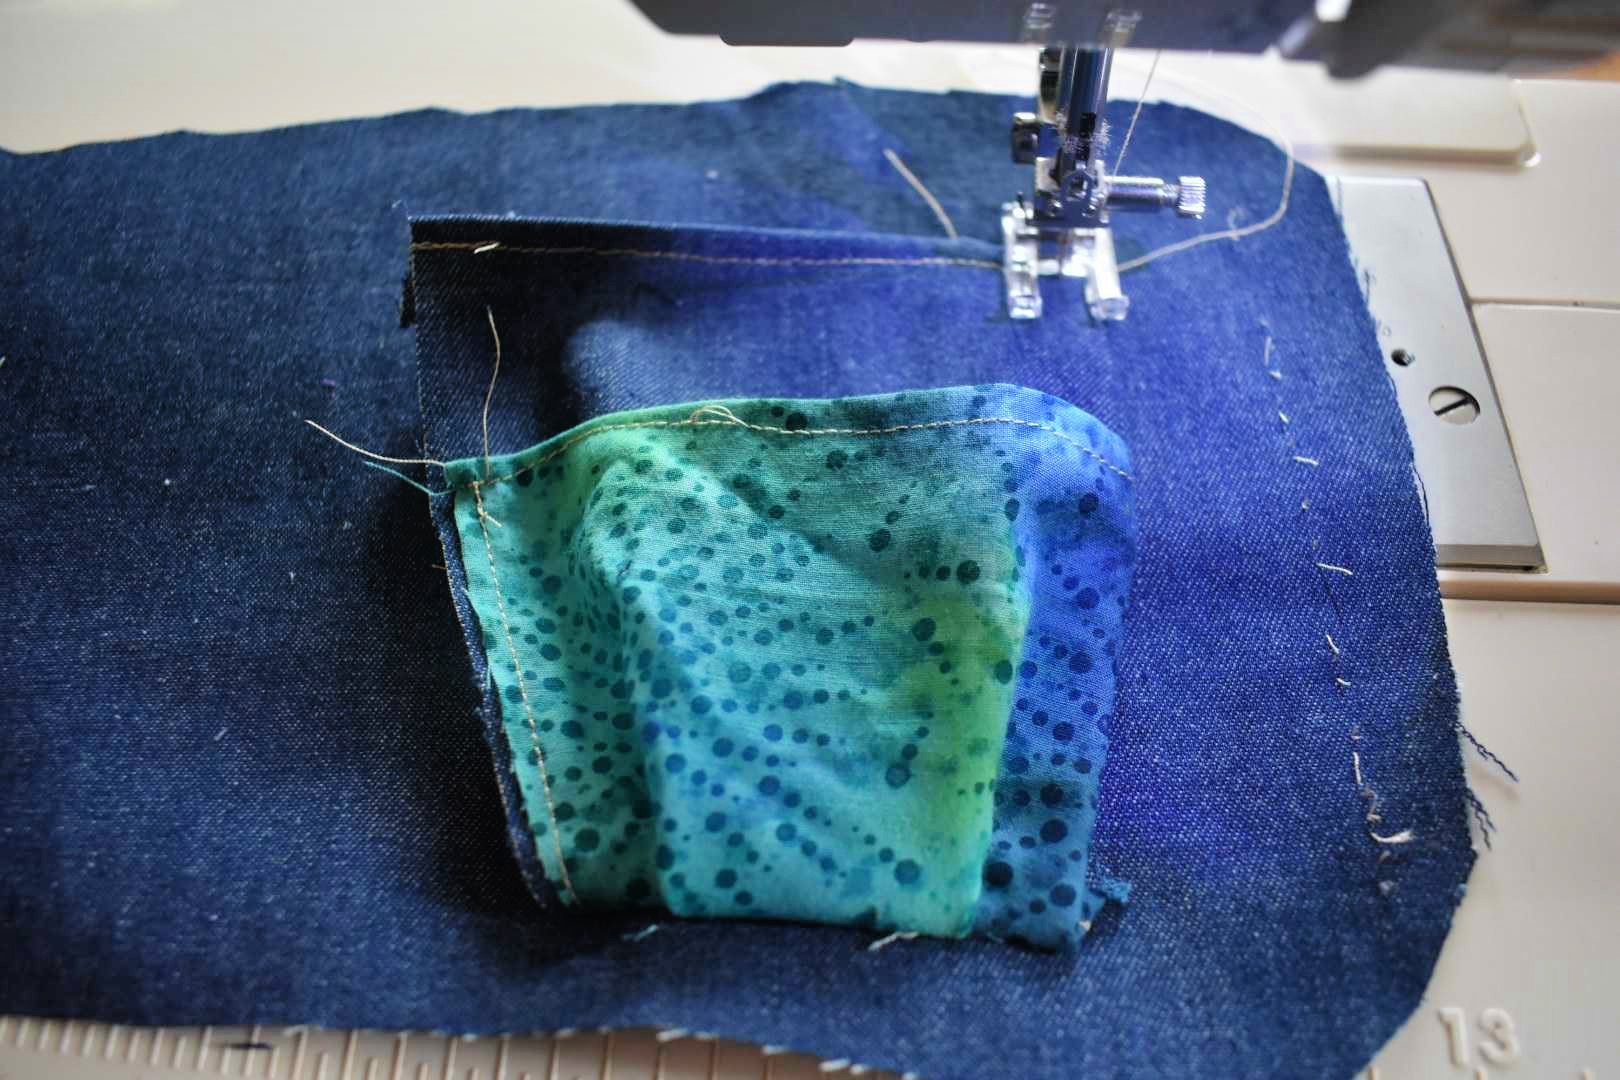
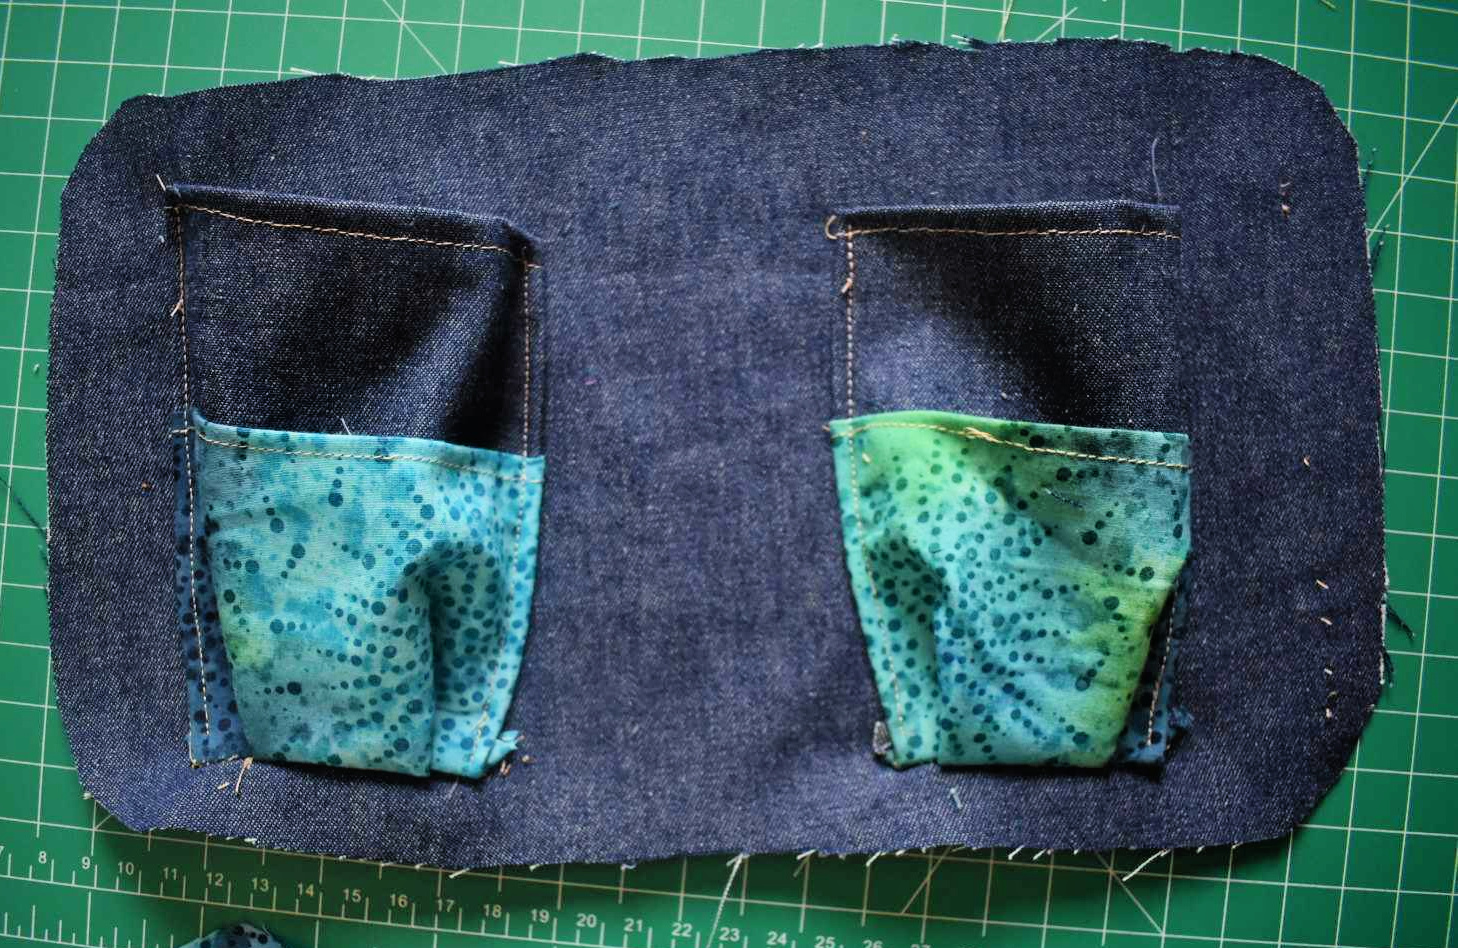
Step 5: Flip the pocket up, tuck the side in, then sew along it. Do this to both sides. One pocket is done! Do the second pocket the same way on the other half of this fabric (next to this pocket).
Step 6: Take the 5″x11″ rectangle of contrasting fabric, and hem a long side. Then, match it to an 8″x11″ main fabric rectangle and lay the contrast over it. Sew around three sides (or across all four, if you prefer to sew it tight instead of leaving a pocket) to create the design on one side. Set this aside.

Step 7: Take the 8″x11″ contrasting rectangle and the 5″x22″ main fabric rectangle. This is going to create the loops for your tincture and salve holder!
Hem the top edge of the 22″ long piece first. Then, sew the ends of the 22″ long piece onto the 11″ long piece (the fabric in the middle will be very loose!)
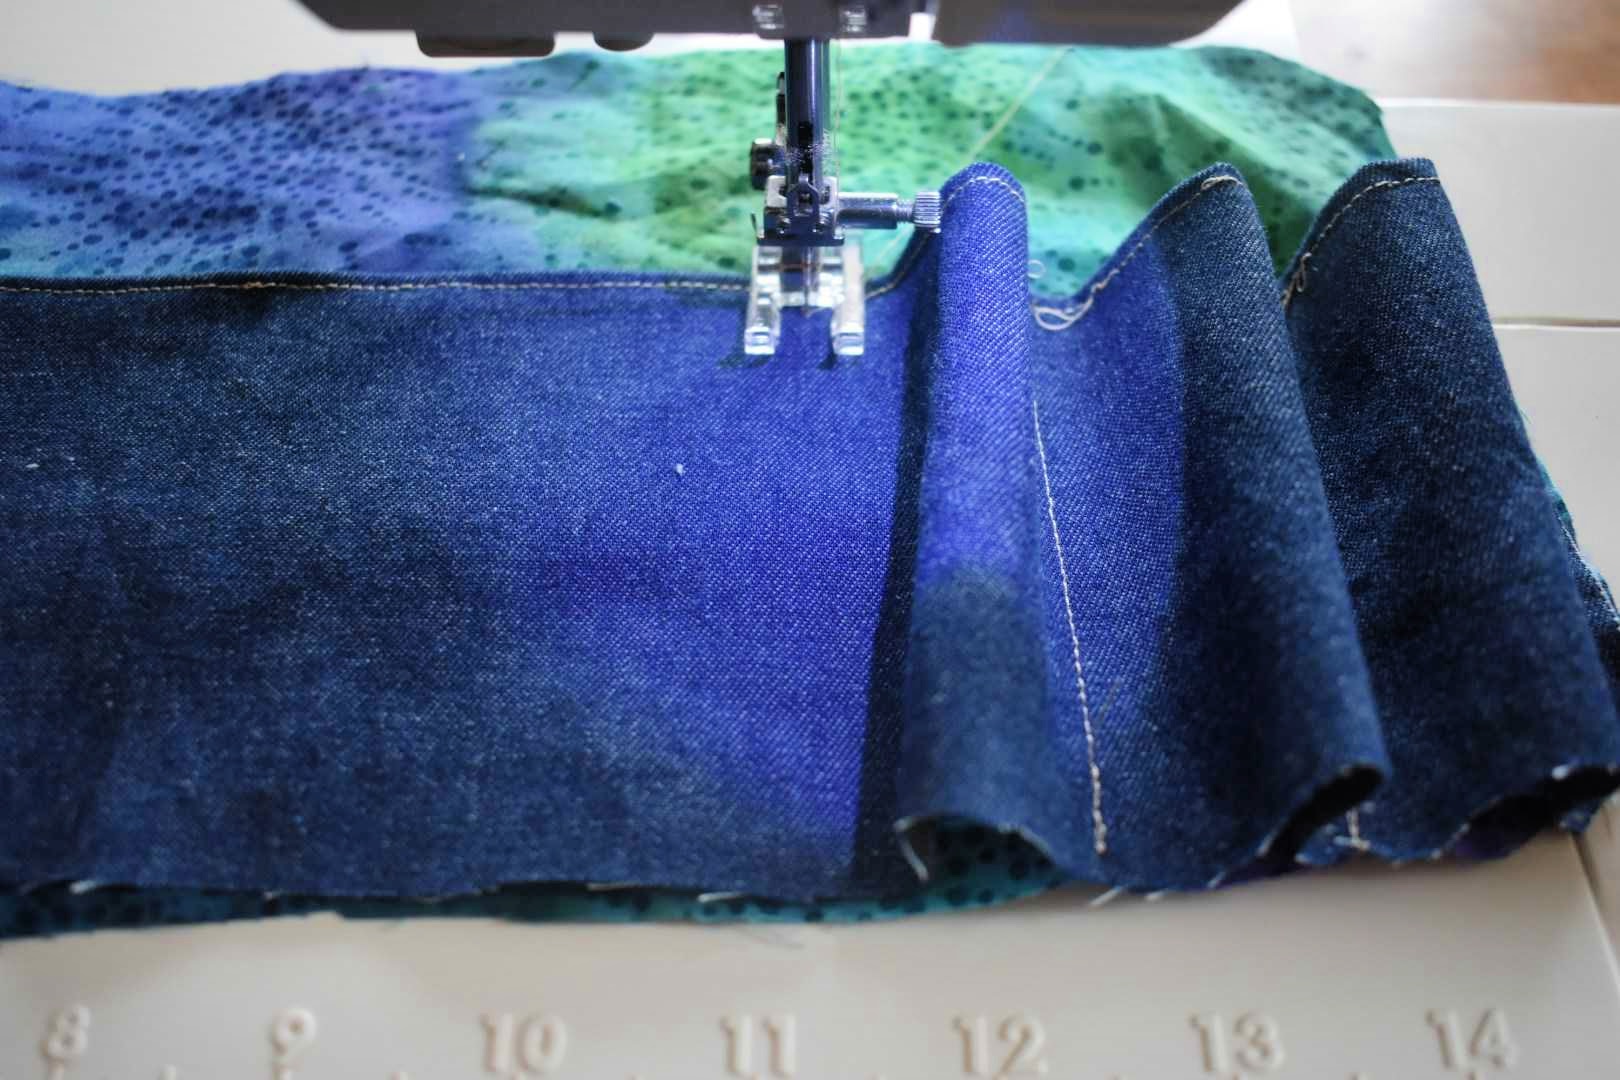
Step 8: At one end, gather the fabric to make these “loops.” Then, sew a straight line down to create a small pocket. Continue down the fabric, making a new loop about every 1″. (There should be about 8 pockets.)
Once this is done, turn the fabric and sew along the bottom. Gather the bottom of the loops into pleats, or just press it down. After, it will look like this:

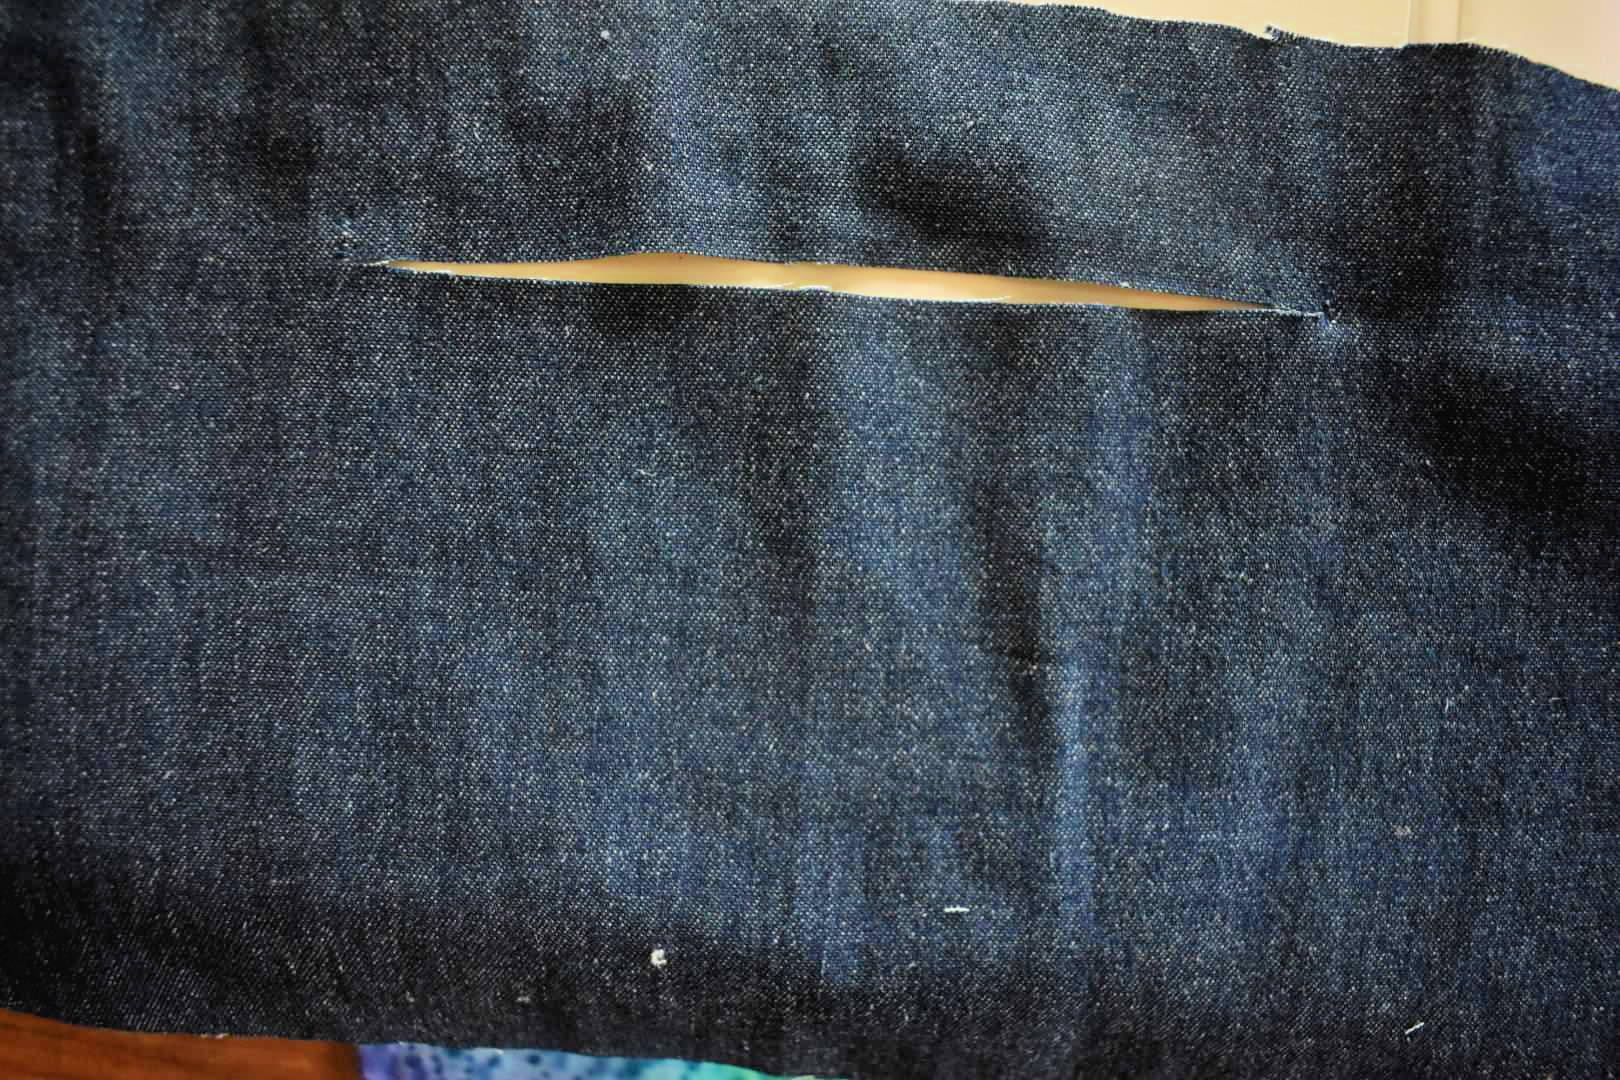
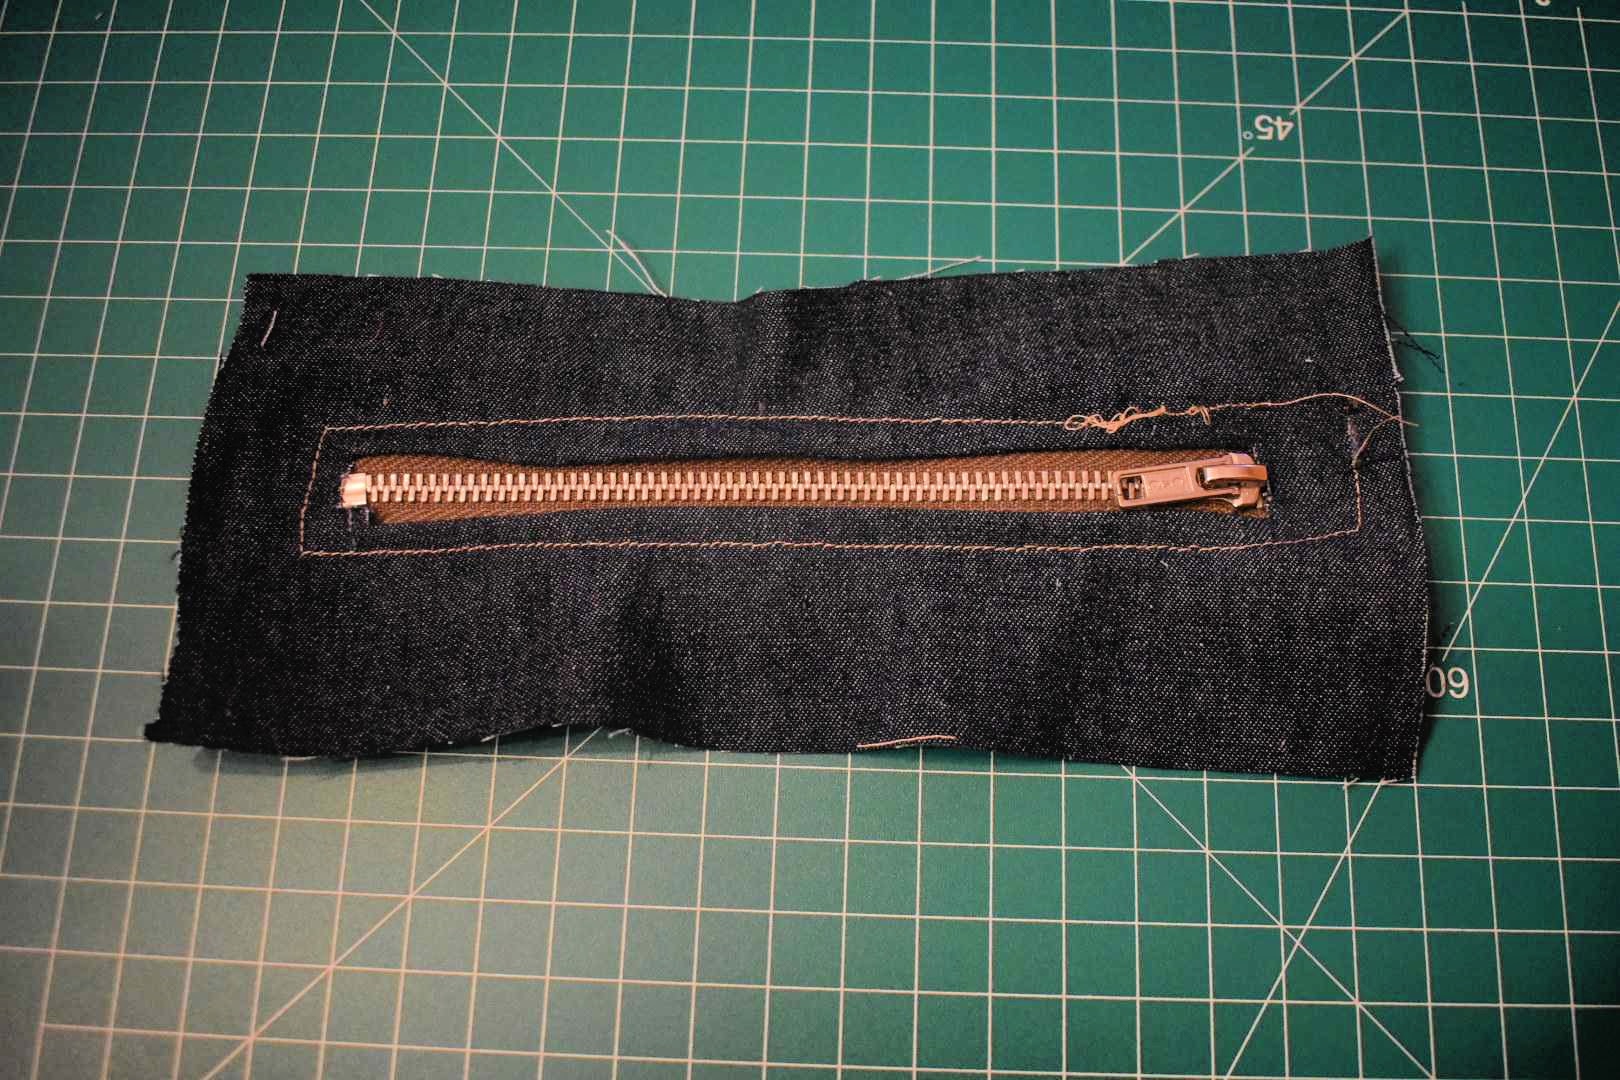
Step 9: It’s time to create the last side — the interior pocket! Select the final 8″x11″ main fabric rectangle and the 6″ zipper. Cut a 6″ line about 2″ from the top of the main fabric (as shown above). This is where the zipper will go.
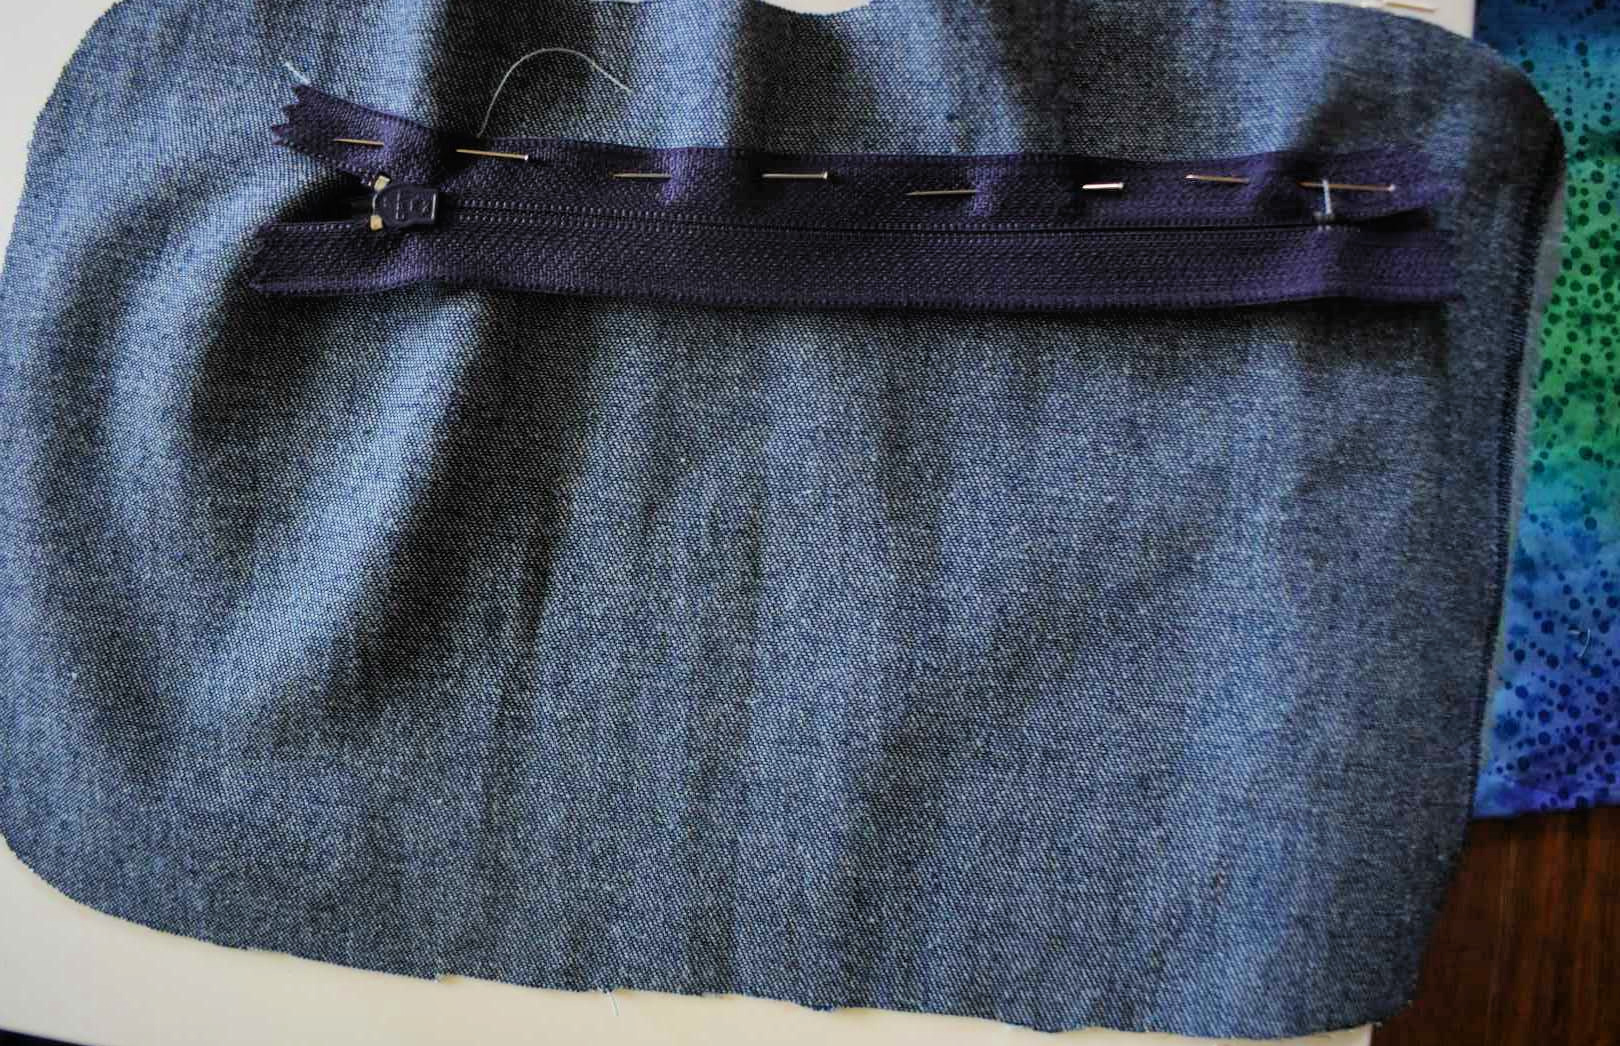
Step 10: Cut about 1/4″ up and down at each end of the line to form a small, foldable flap. Fold this up, and then pin the zipper to it. (The goal is to have a neatly folded finished fabric along the zipper.) Sew along the zipper through the layers of fabric on both sides. Now your zipper is installed!

Step 11: Take your contrasting fabric rectangle and lay the zipper fabric on top (both with right sides facing up). Sew around the outside edges. This creates a pocket with the interior fabric lining it.

Step 12: Select the remedy pocket piece and the piece with the outside contrasting fabric. Match them with the wrong sides together and sew around the outside. (This creates one side of your purse.)

Step 13: Select the interior and exterior pocket pieces and match them on the wrong sides together. Sew around the outside of this. (This creates the other side of your purse.)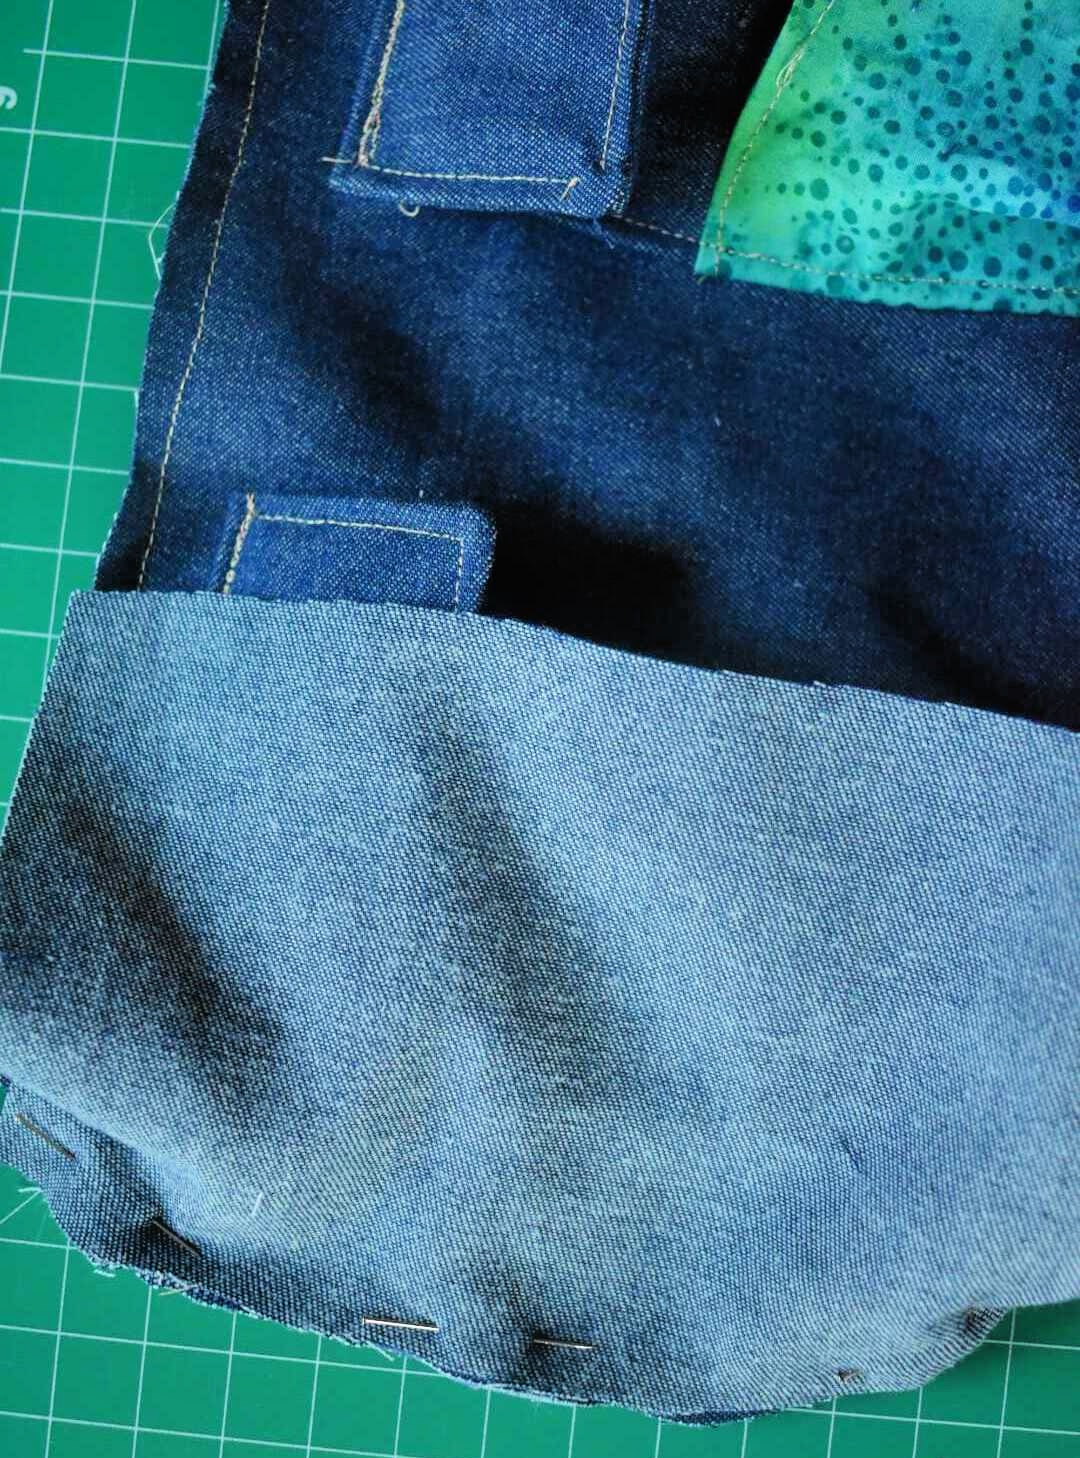
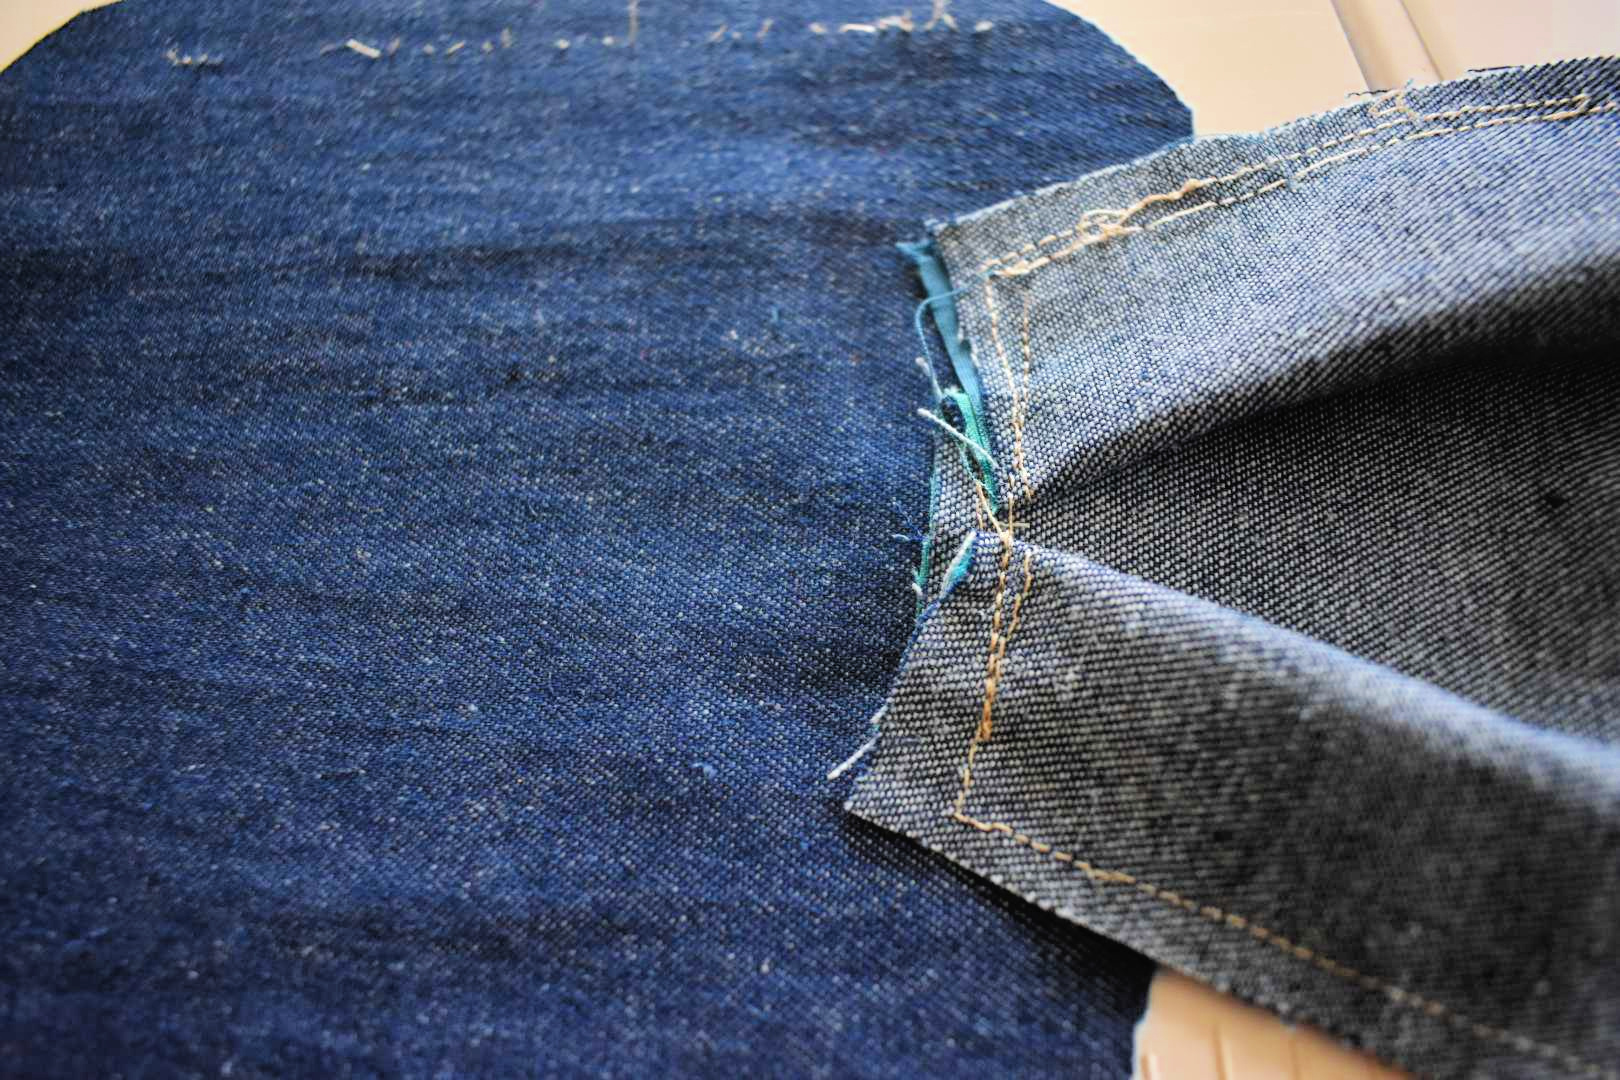
Step 14: Select the 25″x4″ rectangle — this is for the bottom/sides of your purse. Pin this to one side of the purse, right sides together. (It starts at the top of a short side, goes along the bottom of the purse, and back up the other short side.)
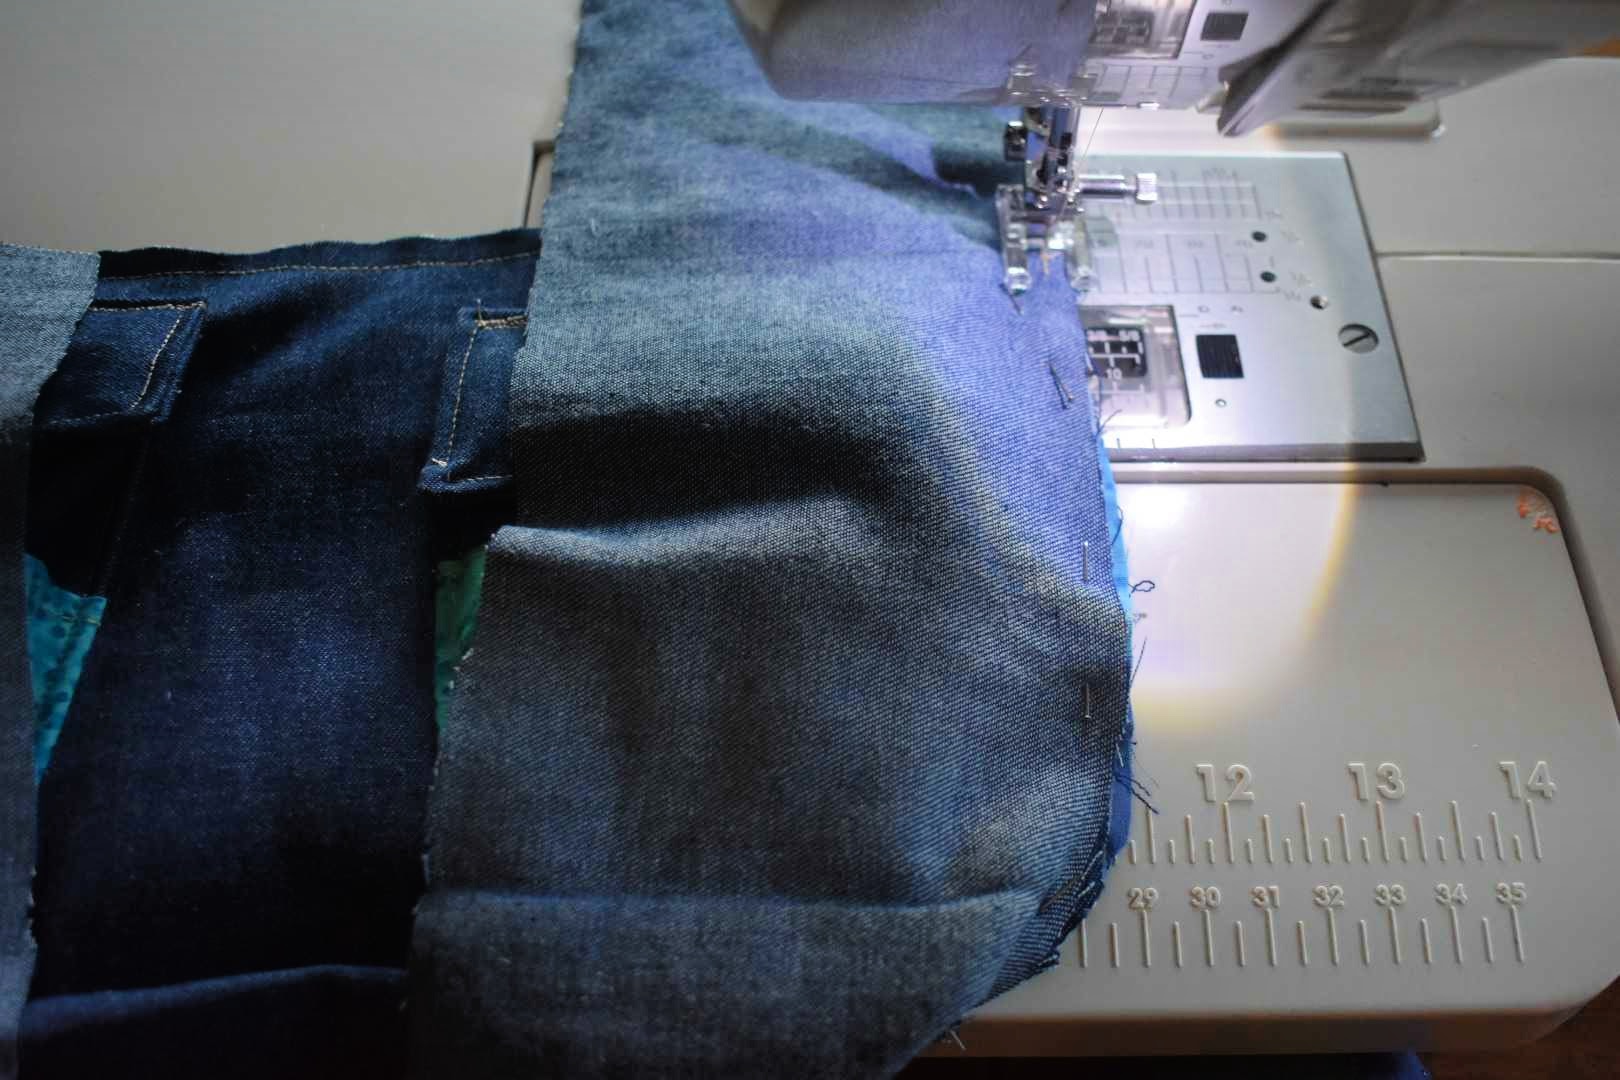
Step 15: Sew along the side of the purse to attach the bottom strip to the sides. Sew along this twice, making sure there are absolutely no gaps or loose areas. This is a “load-bearing” seam!
Repeat this along the other side of the purse. After, it should look like this:

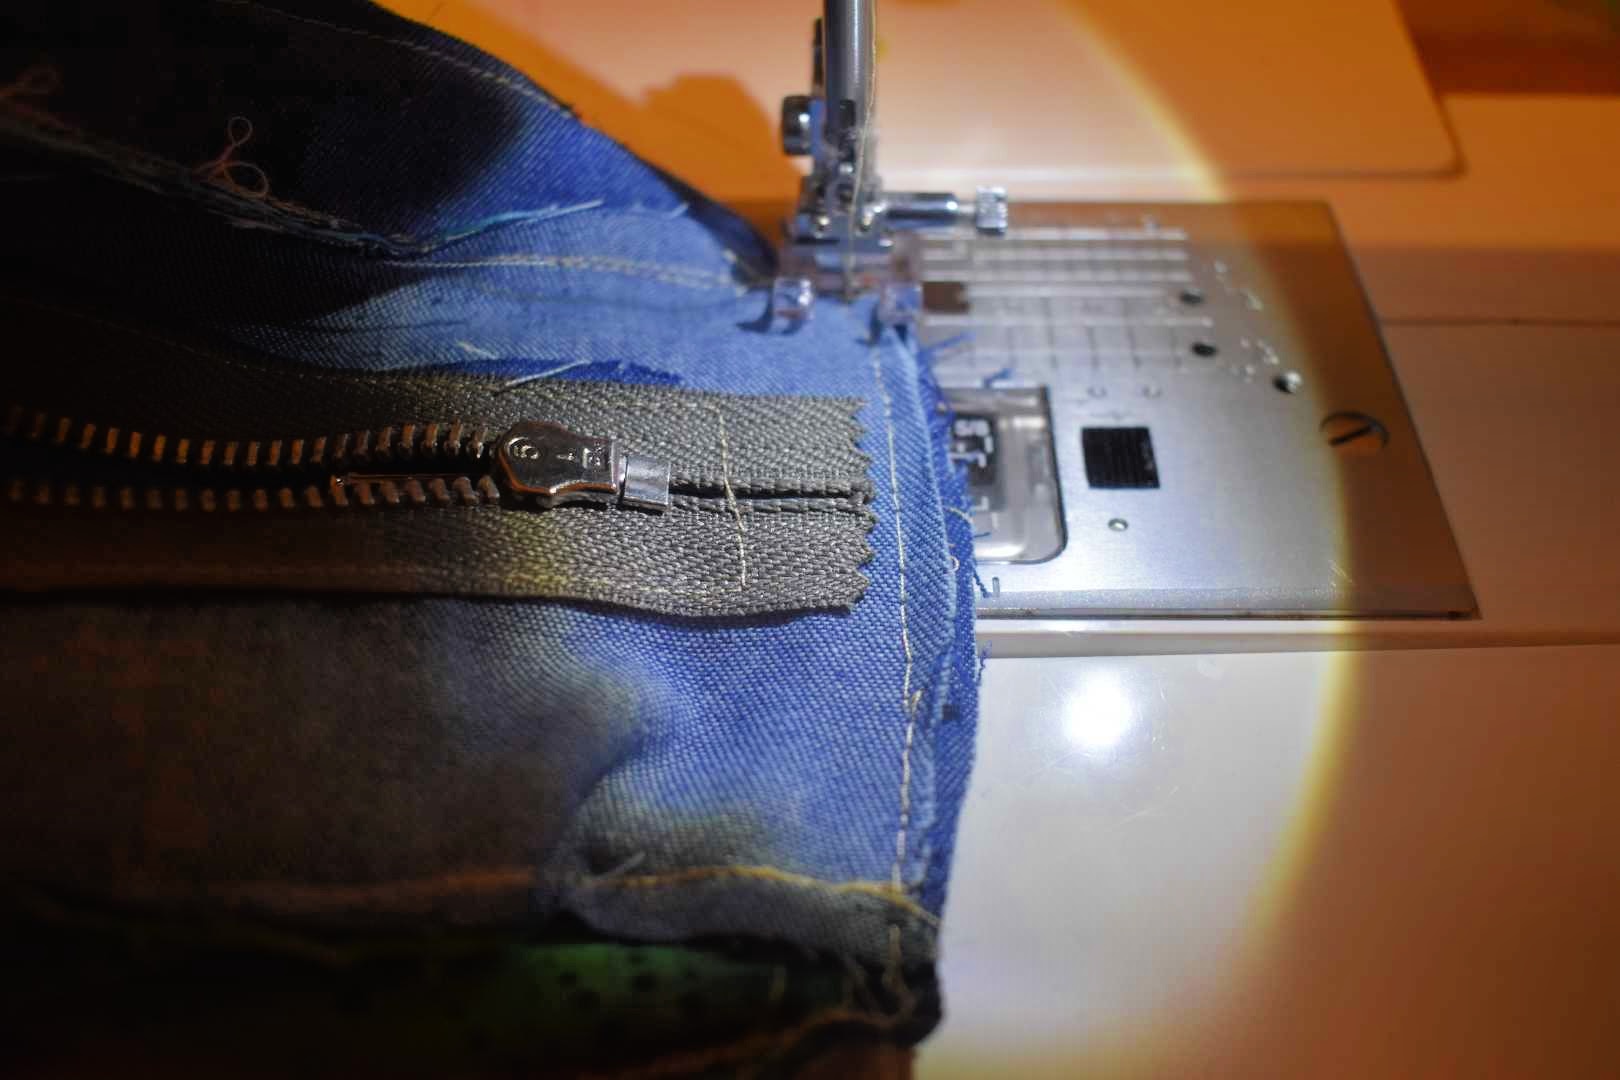
Step 16: Take the 4″x11″ rectangle and install the 7″ zipper in it like the previous zipper. (Cut a line; then cut slightly up/down from it; fold it back; pin it to the zipper and sew along the back.)

Step 17: Place the zipper piece upside down on the purse and pin the LONG sides together. Sew along the long sides only, leaving the short sides open (you will put the strap there soon).
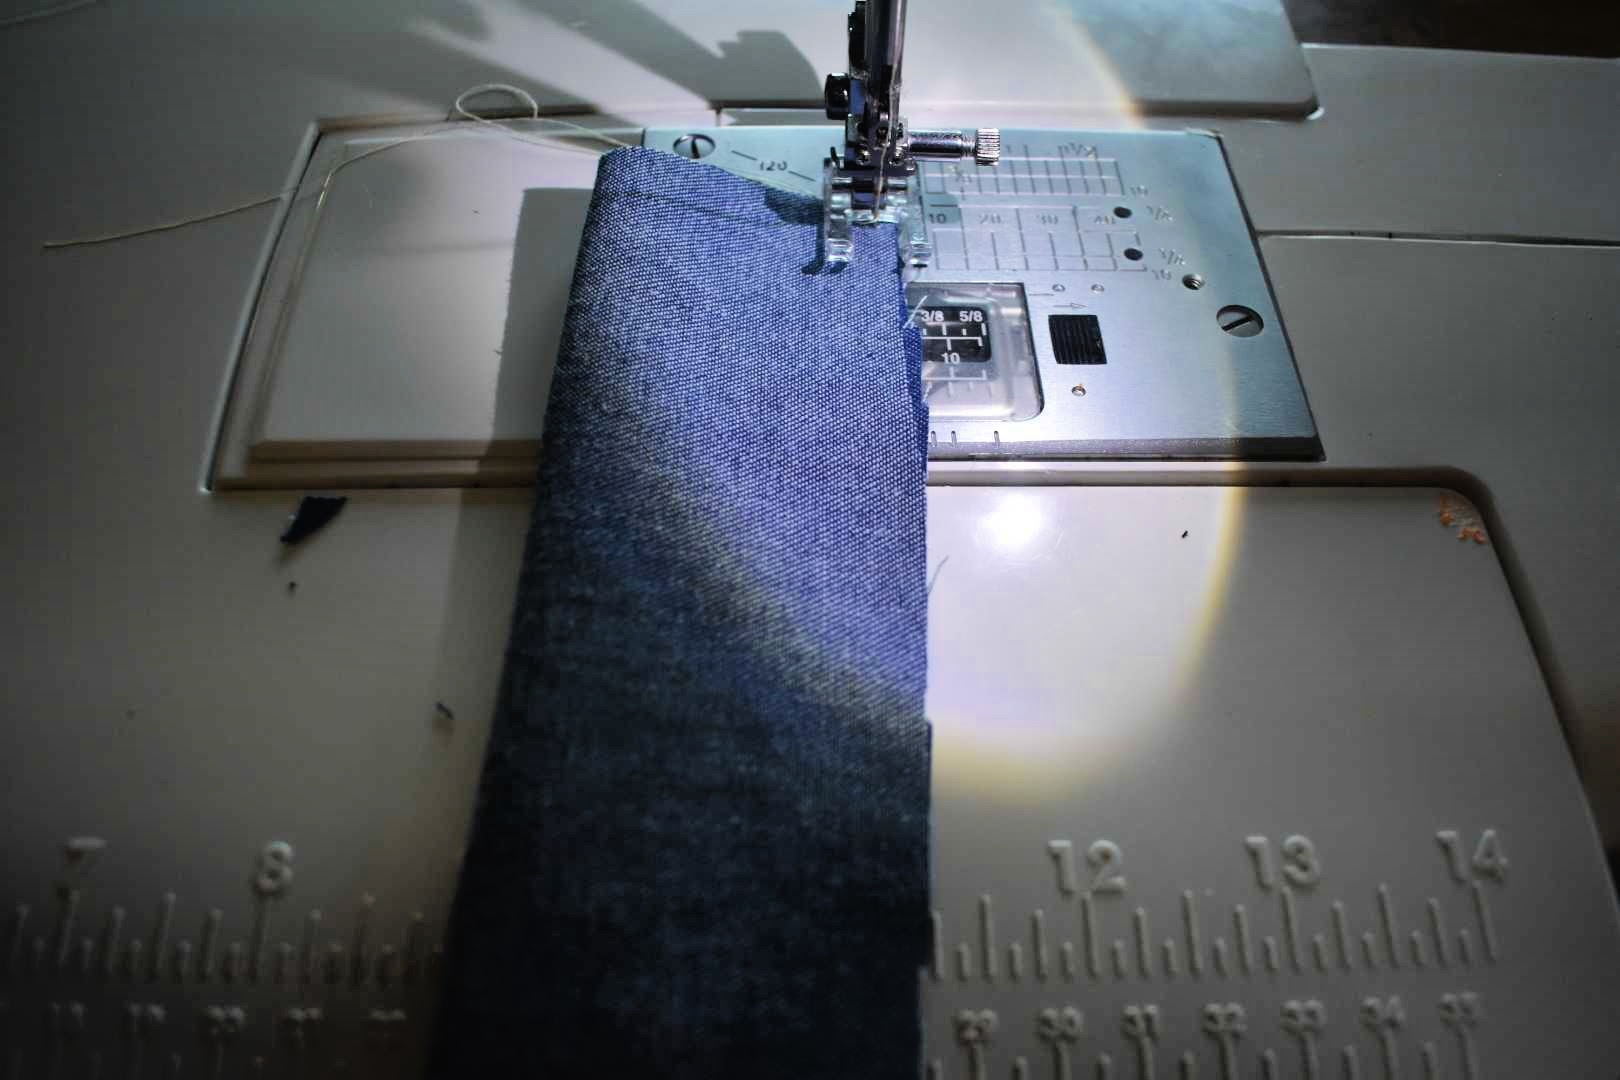
Step 18: Take the 4″x38″ rectangle. Fold it in half, right sides together, and sew along one short side and the open long side (leaving one short side open).
Turn it right side out, tuck the open ends in, and sew across it, then topstitch along the outsides of it.
Repeat this process with the 3″x38″ contrasting fabric rectangle.
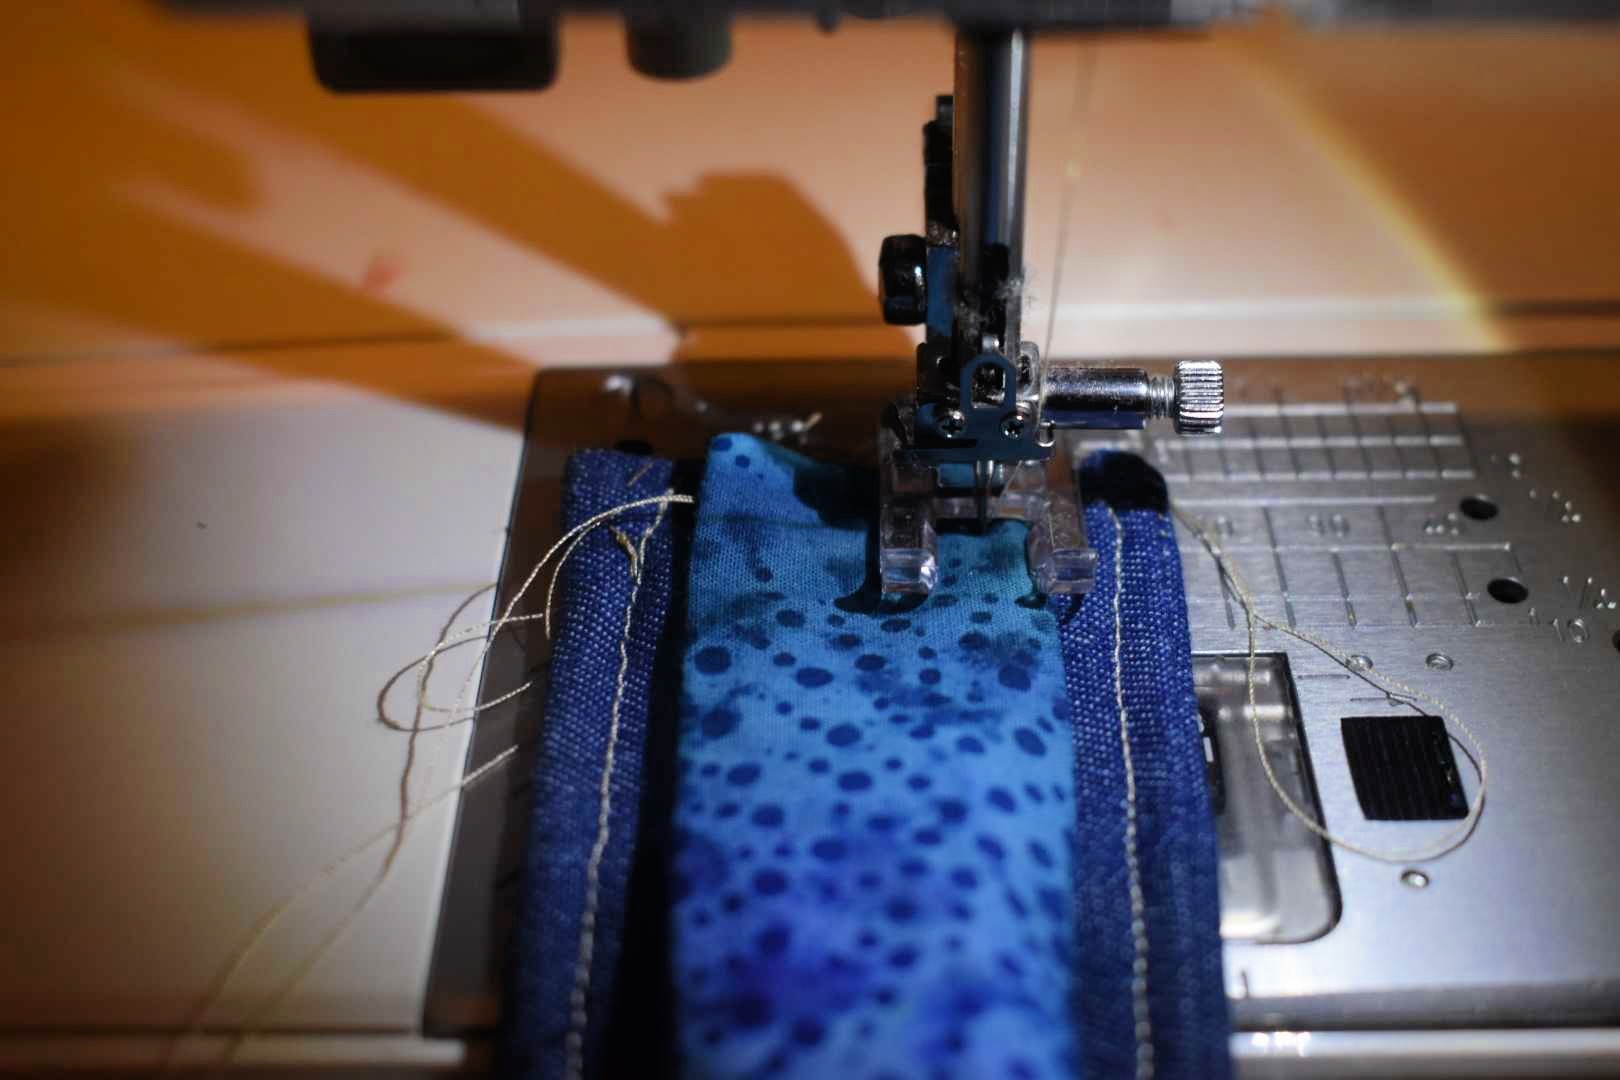
Step 19: Place the contrasting fabric on top of the main fabric. Sew along the edges to put the contrasting fabric onto the main fabric.
The strap is finished!
Step 20: Thread the strap into the bag, right side facing down. The goal is to get the edge of the strap on the small sides of the purse and sew it all down, attaching the strap to the purse. Do this on both sides.
Ensure they are sewn tightly down since this, too, is a load-bearing seam! Go over it more than once. Ensure the entire strap has been caught and the edge has been sewn down. (I made some mistakes here on the first purse I made.)
Now, open the main zipper and turn the purse right side out! You’re done!
