Spring is FINALLY here! Now is the time for seed starting! The gardeners among us have been planning, dreaming and eagerly awaiting warmer days. We want to dig in the dirt. Tend our plants and reap a harvest of tasty veggies.
Last year, we had to buy a significant amount of seedlings from our local nursery. Unfortunately, most of the nursery was afflicted with a blight. So most of our plants were too. We managed to still get a decent yield from most plants. But I decided that this year would be different. This year, we were going to grow seedlings ourselves.
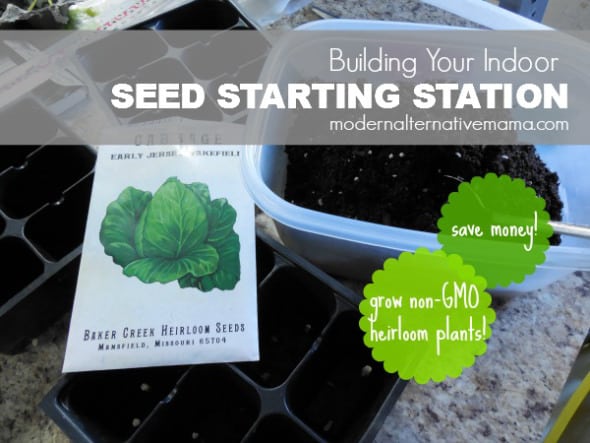
Start with Good Seeds

Seeds pack displays are everywhere this time of year. And most of the time, you’ll do fine with those. Or you can order from a seed supply company. That was the route we chose this year. We wanted non-GMO, heirloom seeds. With heirlooms, we can (hopefully) harvest and save seeds year after year, creating our own little self-sustaining garden.
If you’re looking for seed resources, this article at OrganicGardening.com has a great list of suppliers. We went with Baker Creek Heirlooms Seeds this year. They had an impressive variety of seeds and great shipping rates.
Get your seeds planted
 I used last year’s seedling trays from the nursery. Be sure to put something underneath to catch any water.
This is the easy part. Select some container. Either use last year’s seedling trays, saved yogurt cups, or you can purchase a variety of seed starting containers at your local nursery or home improvement store. We did a little of both.
I avoid really small containers like egg cartons, cause I really don’t want to have to transplant to a larger container if I can help it.
Purchase some starter potting soil, or use your homegrown compost and follow the directions for planting on the back of the seed packet. Be sure to water and keep the seeds moist. Every seed needs warmth, water, and air to germinate.
Set Up Your Seedling Grow Station
 Our grow light suspended from a utility shelf.
We’ve found that a great place to set up a grow station is utility shelving. If you have a laundry room or mud room with a few wire utility shelves, clean a space off for your new plants to grow. At first, they won’t need any light, just a warm spot. So make sure your room is cozy.
We use the shelves in the mudroom and open the heat vent a tad to keep the room a little warmer.
Let there be light! After those seeds germinate, they’re gonna need some light. Even if your seeds are in a room with a window, it doesn’t hurt to give them a little extra. All you need is a simple florescent lighting fixture (here’s a link from Lowes so you can see the type we used) and a bulb specifically made for plants.
 Any brand will do. But you’re looking for a bulb designed for plants.
Using “S” hooks, you can easily hang your light on the shelf above your grow station. Plug it in during the day and give the plants a break at night. Be sure to rotate the plant trays every few days so they get an even distribution of light.
Get Them Ready for the Great Outdoors
One of the most important things you need to do is to acclimate your little seedlings to the outdoors. Is it windy where you live? Some suggest blowing a small fan on the seedlings every now and then to promote strong stems. Still cold at night? Let your plants spend a little time outdoors in the late afternoon, early evening — increasing their exposure over time.
Once temperatures and conditions are right for planting, your plants should be spending most of their time outdoors, so there is little chance of shock once they’re in the garden.
By the time our garden plot is all ready, we hope to have a few homegrown cabbage seedlings to put in the ground. Later this spring we’ll start tomatoes, peppers, herbs, and flowers. Not sure when to start plants? I’ve found the calendar at Veggie Harvest really helpful. Just select the zone your in for your planting calendar.
Now, there’s no need to wait for better weather. Get some seeds and get planting!
Ever started seeds indoors? What method do you use?
SaveSave


[…] out my guest post this week at Modern Alternative Mama for all the […]